All Categories
Featured
Table of Contents
- – Best Plumbing Scripps Ranch San Diego, CA
- – Black Mountain Plumbing
- – Plumber Company Near Me Scripps Ranch San Dieg...
- – Plumber Company Near Me Scripps Ranch San Dieg...
- – Gas Line Plumber Scripps Ranch San Diego, CA
- – Garbage Disposal Installation Scripps Ranch S...
- – Shower Repair Near Me Scripps Ranch San Dieg...
- – Plumber Company Near Me Scripps Ranch San Di...
- – Near Me Plumber Scripps Ranch San Diego, CA
- – Plumbers In Scripps Ranch San Diego, CA
- – Affordable Plumbing Near Me Scripps Ranch Sa...
- – Residential Plumbing Contractors Near Me Scr...
- – Water Heater Installers Scripps Ranch San Di...
- – Black Mountain Plumbing
Best Plumbing Scripps Ranch San Diego, CA
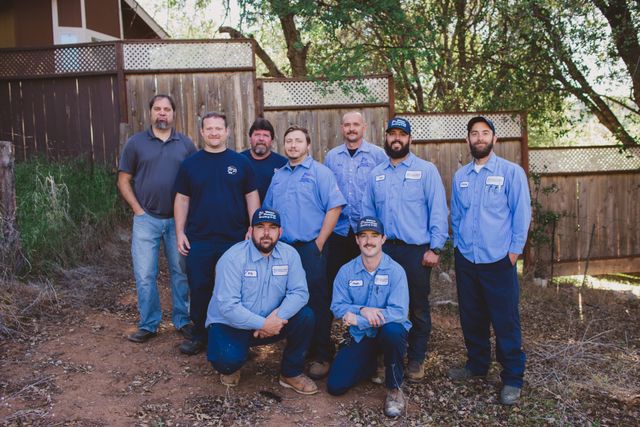
Black Mountain Plumbing
9909 Hibert Street Suite E San Diego, CA 92131(858) 536-4161
Black Mountain Plumbing
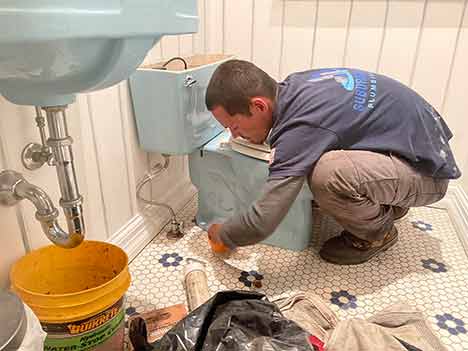
Describe your problem and compare the cost and solutions supplied by each service provider to find the very best worth choice. Examine testimonials and endorsements: While you may be attracted to miss this action in a rush, it's essential to review on-line testimonials and previous client endorsements. This will aid you examine the reliability and integrity of the emergency situation plumber.
Product prices will also be included, and there might be additional rush charges for urgent scenarios. It's advisable to discuss the rates structure with the emergency situation plumbing before hiring them to avoid any type of shocks. Right here are some instant activities and short-lived solutions you can think about while you wait for the emergency situation plumbing to arrive: Here are some crucial actions to follow: Close off the main water system: Find the main water shutoff in your house and turn it off to stop the circulation of water.
Use buckets or towels to accumulate water: If there is a leakage or flooding, use pails or towels to gather water and stop it from spreading out additionally. Throughout a pipes emergency, it's crucial to prioritize your safety and follow these safety and security precautions: Prevent call with standing water: Standing water can be polluted and posture health risks.
Be careful with electrical home appliances: If there is a risk of water entering into contact with electrical appliances, avoid using them till the situation is resolved. Comply with any kind of guidelines given by the emergency plumbing: Once the emergency situation plumber arrives, follow their directions and advice to ensure a secure and efficient resolution of the issue.
Plumber Company Near Me Scripps Ranch San Diego, CA
Yes, several plumbing business provide solutions on weekend breaks and holidays. Emergency plumbers are offered 24/7 to deal with plumbing emergency situations, regardless of the day or time.
"The points that suched as regarding collaborating with Any type of Hour is that I had all the professionals in one area. I was not needing to call three different areas for an electrical contractor, a plumbing or whatever ... it was under one name. They are a one quit shop. It's been a terrific experience for us.
When you need quick, dependable solution for problems with plumbing within your Towson house or business area, you can depend on Catons Pipes, Drains Pipes, & Water Clean-up. Providing professional solutions and emergency situation repair for all our clients in Towson, we are the area's devoted plumbing solution. Despite the problem with your plumbing, you can trust our 24/7 plumbing technicians in Towson.
As the top plumbing in Towson with over 60 years of experience and understanding of drains pipes and sewer systems, we're sure to supply an option to your needs in no time. We know exactly how unpleasant plumbing emergency situations can be.
Plumber Company Near Me Scripps Ranch San Diego, CA
either. Anytime your emergency situation strikes, you can call us 24 hours a day, 7 days a week. No issue exactly how large or small the problem, your premier Towson emergency situation plumbing technician has actually obtained your back. Catons Pipes, Drains & Water Clean-up is proud to care for all our home and company clients in Baltimore Area.
We use the current innovation and tools to finish the repair service or installation in a breeze. From leakages to bathrooms that won't stop running to stopped up showerheads, we deal with it all. Provide us a telephone call at for a cost-free estimate on your pipes repair with specialist Towson pipes solutions.
Discover more about Catons Pipes, Drains & Water Cleaning and the solutions we offer when you see our internet site. Learn about sewer repair work, bathroom and kitchen improvement, and water remediation on our listing of solutions. Look into our blog site for ideas on how to upgrade the plumbing with a kitchen area remodel or exactly how to minimize the quantity of water you use.
This is our typical service. Rapid service at competitive expense-- no additional cost for following day service! All job is assured Neighborhood, expert plumbing professionals Solution is readily available 24 hr/ 365 days a year We just charge from time of arrival.
Gas Line Plumber Scripps Ranch San Diego, CA
Our seasoned plumbing technicians repair any type of water leakage or piece leakage. We recognize that having a Durham plumbing problem is never simple for you and will function with you via the whole process to ensure we have another happy customer.
Our credibility stands behind our name so make sure to call us and ask us concerning our special deals! Bizzy Bee Pipes likewise offers backflow testing that's required each year because of the city needs (Scripps Ranch San Diego Plumber Company Near Me). We provide same-day solution, and our plumbing technicians are on staff 24/7 to take your telephone call and make plans to dispatch a plumbing professional to you
A team of accredited and knowledgeable plumbing professionals who are committed to providing excellent solutions to our clients. 2. Economical and clear pricing. We provide upfront rates so that you know what you are paying for prior to we begin the task. 3. Quality handiwork. We make use of top notch materials and tools to ensure that our job is of the highest possible requirements.
Outstanding client service. We are devoted to supplying outstanding customer support to our customers. We will certainly address all your concerns and attend to any kind of concerns you may have.
Garbage Disposal Installation Scripps Ranch San Diego, CA
Progressive Solution Company has actually been providing extraordinary emergency situation plumbing solution to the Raleigh-Durham location considering that 1983. After greater than thirty years in the community, we recognize the in's and out's of every plumbing emergency situation that may come your method. We have the experienced professionals to take it all on, consisting of: Burst pipes Flooded cellars Dripping faucets Damaged water lines For these usual pipes emergency situations and more, Progressive Solution Business instantly.
We take the convenience and safety and security of our Raleigh-Durham neighbors seriously, so you understand we'll always exist when you need us one of the most, day or evening. You will certainly constantly obtain online assistance when you call Progressive Service Company, guaranteed (Scripps Ranch San Diego Plumber Company Near Me). When a severe plumbing problem strikes, time is important
They were really professional, pleasant, and versatile. The work was to move receptacles and switches from a wall surface that was being eliminated from our residence, and additionally to include receptacles to one more room. They sent two males that needed to invest a number of hours both under and in our residence. I suggest them extremely and will certainly utilize them again.
Shower Repair Near Me Scripps Ranch San Diego, CA
His browse through was simply a couple of days we experienced uncommonly chilly weather condition in mid-October. He was extremely useful by offering answers to my questions.
I had Progressive install a new tankless water heating system. We are really pleased with our new tankless heating system. We have actually had our Cooling and heating replaced by this firm and have an existing service contract and liked them.
our Raleigh water heating unit repair service staff have actually looked into every one of the leading hot water heater and we only supply a few brand names that stand out over the remainder in high quality and value. Scripps Ranch San Diego Plumber Company Near Me. We can fix and change gas water heaters, electric hot water heater, tankless water heaters, or hybrid tankless water heating units
Plumber Company Near Me Scripps Ranch San Diego, CA
A backed up toilet can be a significant problem if it overflows and creates water damages to your home. We provide 24/7 pipes, and with over 120 solution lorries, we can be at your residence to fix the concern ASAP. We will identify the trouble and identify the service prior to any type of work is done.
Dynamic deals tub and shower pipes services, and repair in Raleigh. Progressive will repair your shower plumbing rapidly and get the task done.
Our Raleigh plumbers can mount and service any kind of kind of well pump. Our 24/7 emergency pluming service suggests you'll never need to lack a functioning well pump for long. Water preservation for your home can save you hundreds on your water costs annually. From changing leaky faucets to setting up high-efficiency bathrooms, our Raleigh plumbing technicians can help you apply water conservation remedies throughout your home.
Near Me Plumber Scripps Ranch San Diego, CA
The high quality of your water in your home isn't something you must need to be concerned about. Mounting a water filtration system is quick upgrade that can boost your lifestyle everyday for several years to find. Progressive Service Firm provides only the most effective Raleigh water filtration systems that have actually been vetted by our team.
100% Fulfillment Guaranteed We take satisfaction in being Raleigh's hometown plumbing team. We'll handle all of your pipes problems and make sure that they are taken care of effectively the very first time.
From my very first phone call to Progressive's workplace, my discussion with the electrical manager, via the end of the work when all was done, Progressive did an excellent work for me. They were extremely specialist, friendly, and flexible. The job was to relocate receptacles and switches from a wall surface that was being removed from our home, and likewise to include receptacles to one more space.
I suggest them highly and will certainly use them once more. - Bern Gartts (Nov 2015) - Testimonial From Google Brian performed maintenance examine the cooling and heating (I wish I made use of the correct term). His check out was just a few days we experienced uncommonly chilly weather in mid-October. He was very valuable by offering responses to my concerns.
Plumbers In Scripps Ranch San Diego, CA
I did not like the programmable thermostat and he replaced it with an easy thermostat which I understood much far better than the programmable. I had Progressive install a brand-new tankless water heater.

In addition, it's best method to clean up the area that needs to be checked or worked on, like a commode. Make certain to keep youngsters and pet dogs out of the method once the plumber shows up. Just how much are typical plumbing repair work prices? Usually, pipes repairs price concerning $325 per work yet can vary from $175 to $4,000 or even more.
Affordable Plumbing Near Me Scripps Ranch San Diego, CA
Nevertheless, if you have a pipe that has ruptured, you can anticipate to pay between $1,000 and $4,000 or more. The job that needs to be finished, the size of your home, and the kind of plumbing pipes you have can all impact the last cost. External elements such as supply chain problems and lack of products all play a component in how much this fixing could be.
Any type of plumbing concern requires a quick service. There is no time to waste when you're dealing with a clogged drainpipe or damaged water heater.
100% Complete satisfaction Ensured We take satisfaction in being Raleigh's hometown plumbing team. We'll handle all of your pipes troubles and make certain that they are taken care of appropriately the initial time.
Residential Plumbing Contractors Near Me Scripps Ranch San Diego, CA
From my very first phone call to Progressive's office, my conversation with the electrical manager, via the end of the job when all was done, Progressive did a wonderful job for me. They were very specialist, pleasant, and versatile. The job was to relocate receptacles and buttons from a wall that was being eliminated from our home, and likewise to include receptacles to an additional area.
I suggest them highly and will certainly utilize them again. - Bern Gartts (Nov 2015) - Testimonial From Google Brian executed maintenance check on the a/c (I hope I used the appropriate term). His go to was simply a few days we experienced abnormally cold climate in mid-October. He was extremely practical by offering solution to my questions.
Water Heater Installers Scripps Ranch San Diego, CA
I did not like the programmable thermostat and he replaced it with an easy thermostat which I recognized a lot better than the programmable. I had Progressive install a brand-new tankless water heating unit.
Make sure to keep youngsters and family pets out of the way once the plumbing shows up. Just how much are common plumbing repair service costs?
If you have a pipe that has burst, you can expect to pay in between $1,000 and $4,000 or more. The project that requires to be finished, the size of your home, and the kind of plumbing pipelines you have can all influence the final cost. External factors such as supply chain concerns and scarcity of materials all figure in in just how much this repair may be.
Black Mountain Plumbing
Address: 9909 Hibert Street Suite E San Diego, CA 92131Phone: (858) 536-4161
Email: [email protected]
Black Mountain Plumbing
We understand the battle of dealing with something unforeseen, especially if you do not have any idea regarding the required service. This is where we come in to care for every little thing for you. Any kind of pipes concern requires a quick option. There is no time to squander when you're dealing with a blocked drainpipe or busted hot water heater.
Local Plumbing Near Me Scripps Ranch San Diego, CAWater Line Repair Scripps Ranch San Diego, CA
Affordable Plumber Near Me Scripps Ranch San Diego, CA
Plumbing Installation Scripps Ranch San Diego, CA
Bathroom Plumber Scripps Ranch San Diego, CA
Local Plumber Scripps Ranch San Diego, CA
Plumbing Installation Scripps Ranch San Diego, CA
Water Line Repair Scripps Ranch San Diego, CA
Garbage Disposal Installation Scripps Ranch San Diego, CA
Residential Plumbing Repair Near Me Scripps Ranch San Diego, CA
Garbage Disposal Installation Scripps Ranch San Diego, CA
Local Plumber Scripps Ranch San Diego, CA
Water Heater Installers Scripps Ranch San Diego, CA
Kitchen Plumbing Scripps Ranch San Diego, CA
Plumber For Clogged Toilet Near Me Scripps Ranch San Diego, CA
Water Leak Repair Scripps Ranch San Diego, CA
Affordable Plumber Near Me Scripps Ranch San Diego, CA
Local Plumbing Near Me Scripps Ranch San Diego, CA
Water Heater Installers Scripps Ranch San Diego, CA
Affordable Plumbing Near Me Scripps Ranch San Diego, CA
Water Line Repair Scripps Ranch San Diego, CA
Water Leak Repair Scripps Ranch San Diego, CA
Best Plumbing Scripps Ranch San Diego, CA
Plumber Shower Installation Scripps Ranch San Diego, CA
Local Plumber Scripps Ranch San Diego, CA
Affordable Plumber Near Me Scripps Ranch San Diego, CA
Best Plumber Scripps Ranch San Diego, CA
Bathroom Plumber Scripps Ranch San Diego, CA
Residential Plumbing Repair Near Me Scripps Ranch San Diego, CA
Kitchen Plumbing Scripps Ranch San Diego, CA
Water Leak Repair Scripps Ranch San Diego, CA
Residential Plumbing Repair Near Me Scripps Ranch San Diego, CA
Plumbing Installers Near Me Scripps Ranch San Diego, CA
Kitchen Plumbing Scripps Ranch San Diego, CA
Plumbing Installers Near Me Scripps Ranch San Diego, CA
Best Plumbing Scripps Ranch San Diego, CA
Kitchen Plumbing Scripps Ranch San Diego, CA
Water Filtration Services Near Me Scripps Ranch San Diego, CA
Residential Plumbing Services Near Me Scripps Ranch San Diego, CA
Garbage Disposal Installation Scripps Ranch San Diego, CA
Plumber Shower Installation Scripps Ranch San Diego, CA
Water Heater Installers Scripps Ranch San Diego, CA
Affordable Plumber Near Me Scripps Ranch San Diego, CA
Best Plumber Scripps Ranch San Diego, CA
Affordable Plumber Near Me Scripps Ranch San Diego, CA
Bathroom Plumber Scripps Ranch San Diego, CA
Gas Line Plumber Scripps Ranch San Diego, CA
Plumbing Installers Near Me Scripps Ranch San Diego, CA
Shower Repair Near Me Scripps Ranch San Diego, CA
Shower Repair Scripps Ranch San Diego, CA
Residential Plumbing Contractors Near Me Scripps Ranch San Diego, CA
Water Leak Repair Scripps Ranch San Diego, CA
Residential Plumbing Contractors Near Me Scripps Ranch San Diego, CA
Plumber Toilet Repair Scripps Ranch San Diego, CA
Local Plumber Scripps Ranch San Diego, CA
Plumber Toilet Repair Scripps Ranch San Diego, CA
Water Heater Installers Scripps Ranch San Diego, CA
Plumber Company Near Me Scripps Ranch San Diego, CA
Near Me Plumber Scripps Ranch San Diego, CA
Plumber For Clogged Toilet Near Me Scripps Ranch San Diego, CA
Water Heater Installers Scripps Ranch San Diego, CA
Bathroom Plumber Scripps Ranch San Diego, CA
Water Heater Installers Scripps Ranch San Diego, CA
Affordable Plumber Near Me Scripps Ranch San Diego, CA
Plumbing Installation Services Scripps Ranch San Diego, CA
Plumbing Installation Near Me Scripps Ranch San Diego, CA
Shower Repair Near Me Scripps Ranch San Diego, CA
Water Line Repair Scripps Ranch San Diego, CA
Plumbing Installation Near Me Scripps Ranch San Diego, CA
Water Filtration Services Near Me Scripps Ranch San Diego, CA
Plumber For Clogged Toilet Near Me Scripps Ranch San Diego, CA
Best Plumbing Scripps Ranch San Diego, CA
Local Plumbing Near Me Scripps Ranch San Diego, CA
Plumbers In Scripps Ranch San Diego, CA
Plumbing Installers Near Me Scripps Ranch San Diego, CA
Plumber Toilet Repair Scripps Ranch San Diego, CA
Garbage Disposal Installation Scripps Ranch San Diego, CA
Plumber For Clogged Toilet Near Me Scripps Ranch San Diego, CA
Plumbers In Scripps Ranch San Diego, CA
Plumbing Installation Services Scripps Ranch San Diego, CA
Near Me Seo Citations Scripps Ranch San Diego, CA
Finding A Seo Marketing Company Scripps Ranch San Diego, CA
Black Mountain Plumbing
Table of Contents
- – Best Plumbing Scripps Ranch San Diego, CA
- – Black Mountain Plumbing
- – Plumber Company Near Me Scripps Ranch San Dieg...
- – Plumber Company Near Me Scripps Ranch San Dieg...
- – Gas Line Plumber Scripps Ranch San Diego, CA
- – Garbage Disposal Installation Scripps Ranch S...
- – Shower Repair Near Me Scripps Ranch San Dieg...
- – Plumber Company Near Me Scripps Ranch San Di...
- – Near Me Plumber Scripps Ranch San Diego, CA
- – Plumbers In Scripps Ranch San Diego, CA
- – Affordable Plumbing Near Me Scripps Ranch Sa...
- – Residential Plumbing Contractors Near Me Scr...
- – Water Heater Installers Scripps Ranch San Di...
- – Black Mountain Plumbing
Latest Posts
Irvine Medicare Supplement Insurance Near Me
Affordable Home Insurance For Seniors Seal Beach
Employee Benefits Outsourcing Companies Fullerton
More
Latest Posts
Irvine Medicare Supplement Insurance Near Me
Affordable Home Insurance For Seniors Seal Beach
Employee Benefits Outsourcing Companies Fullerton