All Categories
Featured
Table of Contents
- – Rubber Roofing For Rv Diamond Bar, CA
- – OCRV Center
- – Best Rv Roof Repair Diamond Bar, CA
- – Rv Rubber Roof Replacement Diamond Bar, CA
- – Rv Roof Leak Repair Diamond Bar, CA
- – Rubber Roof Installation Diamond Bar, CA
- – Rubber Roofing For Rv Diamond Bar, CA
- – Repair Rv Roof Leak Diamond Bar, CA
- – Rubber Roof For Rv Diamond Bar, CA
- – Roof Repair For Rv Diamond Bar, CA
- – Rubber Roof Installation Diamond Bar, CA
- – Rv Roof Leak Repair Near Me Diamond Bar, CA
- – Motorhome Roof Replacement Diamond Bar, CA
- – Repair Rv Roof Diamond Bar, CA
- – Rv Roof Replacement Diamond Bar, CA
- – OCRV Center
Rubber Roofing For Rv Diamond Bar, CA
When acquiring the rubber roofing finishings or sealers, maintain your recreational vehicle's dimensions in mind to guarantee you receive the appropriate quantity. After cleaning the entire roofing system and permitting it to dry, apply a layer of paint to the roofing system making use of a roller. Make certain to review and follow the guidelines on the sealant bundle for optimum preparation.
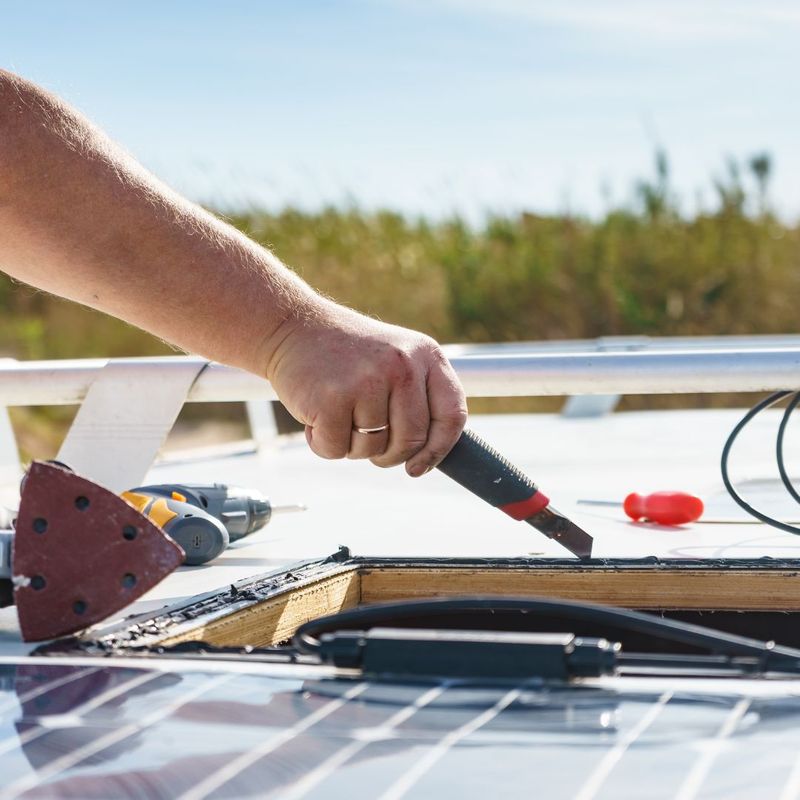
A spot will certainly be required if you uncover a little leak or tear on your RV roofing system. The good news is, makers have actually produced fixings and motor home roofing adhesives that are easy to apply and durable. Most patches need little prep work apart from cleaning the broken area and applying the patch over it, similar to a band-aid.
Fiberglass roof coverings' top layer, like recreational vehicle rubber roofing systems', can oxidize with time, giving them a flaky, milky look. Scuff off any loose, crinkled sections of the coating prior to cleaning and sand the roofing's surface using penalty to medium grit sandpaper afterwards. The covering will cling better to a slightly abraded surface.
Best Rv Roof Repair Diamond Bar, CA
After the area has actually been smoothed and cleaned, include fiberglass patches and adhesive layer by layer, as guided by the repair service package. At the end, coat your motor home with a sealer to the project and refinish the location as needed. The resealing of light weight aluminum and other metal motor home roof coverings is done with a certain coating produced an aluminum roofing product.
The easiest approach to fix a steel roof with more major damage is to replace the metal panel, which is a procedure that may vary based upon your RV. You could be able to repair your metal roof utilizing a peel-and-stick spot depending on the extent of the damages. See to it you select one that is particularly intended for metal roofings, as the sticky chemistry varies.
Is your RV's roofing system obtaining tired? All set to recover or repair your RV, camper, or trailer roofing? RV roofing systems have a minimal life before they require to be replaced.
The fantastic part is that it's super easy to repair your roof covering once and never ever have to worry about it again. If you don't have one, utilize a scrub brush and naturally degradable cleanser.
Rv Rubber Roof Replacement Diamond Bar, CA
Non-silicone caulking can be covered over if it's adhered well. Give a final clean with Acetone before application; this promotes attachment and works as a final cleaner.: Once completely dry, complete your prepping with your choice of recreational vehicle Flex Repair work products. Recreational Vehicle Flex Repair Service Roof Tape is utilized to connect bigger locations and joints.
You can also utilize the motor home Flex Repair Work 100% Silicone Motor Home Roofing Finish around vents and skylights.: Apply a heavy layer of 100% Silicone Roofing Finish around locations you will certainly not be able to roll. i.e., sides, around vents, skylights, AC, and so on: Use a heavy coat of 100% Silicone Roof Covering Finish to the whole roof covering.
Rv Roof Leak Repair Diamond Bar, CA
: If you apply the covering thick sufficient on your first coat, you can finish the final coverage required in one layer. If not, prepare to use a 2nd layer as quickly as the first one awaits additional job. This is typically within 24 hr. Right here are professional suggestions to assist you with an easy, effective repair procedure for your RV.
To stop the layer from treating prematurely due to moisture in the air, always change the cover on the container when it's not in use.: The layer is developed to cover about 60 sq ft per gallon. Depending on your recreational vehicle's dimension, we offer customized packages:: The package includes 5 gallons of layer, 1 roll of roofing tape, and a 4-pack of self-leveling caulking.
For fiberglass roofs, preliminary sanding is suggested to guarantee the finishing adheres properly.: Healing times vary with temperature and humidity. If the finish begins to skin over in the pail, eliminate this layer and mix well prior to proceeding. For application, standard paint rollers are suitableapply with a light touch, but do not be timid with the amount of finishing you roll on.
We stand by the quality of our product with a 100% Life time Warranty, supplying you with complete self-confidence in your acquisition. That's how easy it is to fix your RV's roof covering and fail to remember about doing roof covering upkeep ever once again. Proceed and recover your roofing system for the last time now.
Rubber Roof Installation Diamond Bar, CA
Acetone and cloths for a last wipe (offered at stores like Home Depot or Walmart). Single use paint brushes, rollers, and post extensions (can be located in a Buck Shop). Repaint tray and small pail Disposable gloves Painter's tape.
The thought of changing your RV's roofing may be at the top of your prospective RVing headaches. The entire process can be complicated, expensive, and time consuming. Nonetheless, if you go in understanding what to anticipate, it will certainly be much less demanding, and you'll wind up with a glossy new roof supplying tranquility of mind out when driving.
Fortunately, my RV roof covering replacement went less complicated than I prepared for. How do you understand if your roof covering requires to be replaced?
Interior damage is a possible indication. Examine along your ceilings and walls for soft areas that might indicate dampness or water leakages. Search for bubbles in the wall surface treatments. Ceiling discolorations or patches of mold or mold can also show water invasion. If you locate any type of interior damage, the following step is to determine the resource of the leak.
Rubber Roofing For Rv Diamond Bar, CA
If you have damages to your Recreational vehicle roofing system, a specialist should figure out whether you're far better off repairing or changing the roof covering. Roofing substitutes are pricey but provide both value and peace of mind.
If somebody else has crashed right into your RV, their insurance could possibly cover the substitute. If your service warranty or insurance coverage does not cover your roof replacement, you will need to spend for it out of pocket. If a warranty or insurance coverage covers the price, you'll just have to pay the amount of your deductible.
This relates to various other circumstances where damages happens, usually while the recreational vehicle isn't in procedure, such as storm damages. Your future insurance coverage prices might not rise if you're discovered not to be to blame. Unless you're exceptionally useful, you'll likely require to locate a specialist to replace your recreational vehicle roofing.
After discovering a repair work shop, we went down off our travel trailer for a first evaluation. In this instance, the insurance coverage really did not send an insurer out for an in-person assessment, but some companies need you to have an adjuster look at your RV roof covering to validate the damages.
Repair Rv Roof Leak Diamond Bar, CA
From there, the roofing system specialist only offered one kind of roofing, so we didn't have any type of choices to make. In some scenarios, you might have numerous roof covering alternatives to take into consideration, with each offering unique pros and cons. Once the insurance policy was approved, the specialist obtained to work. It may take numerous weeks or months to obtain your RV's roofing replaced.
After a couple of short weeks, our roofing replacement was full. Our insurer paid the shop directly for everything aside from our deductible. It was truthfully a a lot easier procedure than I pictured. I was happy to have an excellent local agent and a nationwide firm as a company. A full recreational vehicle roofing substitute commonly costs several thousand bucks.
Mike with Recreational Vehicle Roofing Repair work Florida supports his product 100% and he uses a two decades guarantee for roof job which is quite excellent. The solution was very good and my only gripe was a miscommunication on pricing over the phone, but Mike Learn more - A. Individual
Rubber Roof For Rv Diamond Bar, CA
Our spray finishing is created to get rid of all the caulking joints and seams in your Motor home roof. When we spray your Motor home roofing system, we replace all your air vent pipes and lids, refrigerator base and lids, standard vent covers, install brand-new Camco air vent covers and brand-new a/c gaskets.
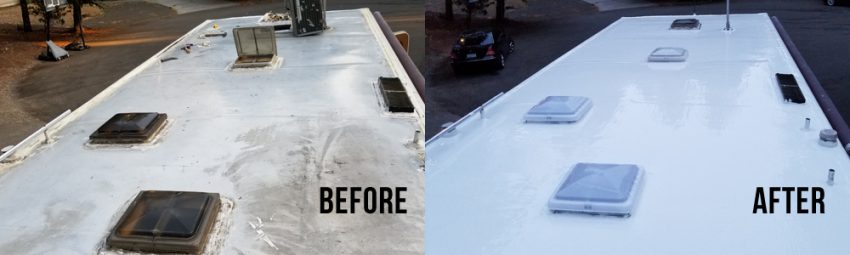
Motor home roofings have a minimal life prior to they require to be replaced. Generally, it's on average every 1015 years. This typically costs about $3000$4000 each time unless you know the key to recovering your roofing finally at an ordinary life time expense of regarding $549.95 with our roofing system finish.
Roof Repair For Rv Diamond Bar, CA
Review MY TALE for complete information. Proper application will expand the life of your motor home's roofing system, keeping it safe from the components and ready for all your journeys. Follow this guide for a smooth, efficient application.: Start with power washing your motor home, camper, or trailer roofing for complete cleaning.
Remove all silicone and old, flaky caulking. Non-silicone caulking that's still adhered well can be coated over. Completed with an acetone wipe to enhance adhesion.: Once dry, prepare the surface area with motor home Flex Repair service products. Use Recreational Vehicle Flex Fixing Roofing System Tape for larger locations and seams and motor home Flex Fixing Self Levelling Caulking Lap Sealer around vents, seams, and skylights.
Rubber Roof Installation Diamond Bar, CA
: Begin with a heavy layer of 100% Silicone Roofing system Covering in areas that a roller can not reach, such as edges and around vents. After that, use a hefty layer over the entire roof covering, using a small jug or pitcher to take care of the coating.: Aim to apply the layer thick sufficient to cover the whole roof in one coat.
Tips for Effective Application Follow these specialist pointers to navigate via a seamless, efficient application process for your roofing system utilizing Silicone Sealer Coating.: Always mix the finishing well prior to each usage to make sure even uniformity throughout the application process.: To stop the coating from healing as a result of direct exposure to air dampness, replace the lid on the jug when not actively utilizing it.
For a fiberglass surface area, it's advised to roughen or sand the location initially for much better adhesion.: Bear in mind that curing times can vary depending on the temperature level and moisture levels.: If the covering starts to skin over in the container, merely eliminate this layer and mix well before continuing your application.
Rv Roof Leak Repair Near Me Diamond Bar, CA
: Correctly kept, the finish has a shelf life of 2 years, allowing for future use if needed. We stand by our product with a 100% Life time Warranty, offering you satisfaction with your purchase. Rv Fiberglass Roof Repair Diamond Bar. That's just how easy it is to repair your roof covering and forget doing roofing upkeep ever once again
If the water is entering past the above items they might require to be gotten rid of and have the putty tape changed to stop water damages. ***(Added labor perhaps needed for substitute of sun damaged items or putty tape failure.) A follow-up inspection is required within 90-days of the completed service.
Motor home roofs have a restricted life before they need to be replaced. Usually, it gets on average every 1015 years. This usually costs about $3000$4000 each time unless you understand the trick to restoring your roof covering at last at an average lifetime cost of regarding $549.95 with our roofing system covering.
Correct application will expand the life of your RV's roofing, maintaining it secure from the components and all set for all your experiences. Follow this guide for a smooth, effective application.: Begin with power washing your RV, camper, or trailer roof covering for complete cleaning.
Motorhome Roof Replacement Diamond Bar, CA
Eliminate all silicone and old, flaky caulking. Non-silicone caulking that's still adhered well can be covered over. Completed with an acetone wipe to improve adhesion.: As soon as dry, prepare the surface area with RV Flex Repair service products. Usage Recreational Vehicle Flex Fixing Roofing Tape for larger areas and joints and recreational vehicle Flex Repair Service Self Levelling Caulking Lap Sealant around vents, seams, and skylights.
: Beginning with a heavy coat of 100% Silicone Roof covering Layer in areas that a roller can't reach, such as edges and around vents. Use a hefty layer over the whole roof, making use of a little container or bottle to handle the coating.: Objective to use the covering thick enough to cover the whole roofing in one coat.
Repair Rv Roof Diamond Bar, CA
Tips for Effective Application Comply with these specialist ideas to navigate via a seamless, efficient application process for your roof using Silicone Sealant Coating.: Constantly stir the finishing well prior to each usage to make sure even uniformity throughout the application process.: To protect against the layer from treating because of direct exposure to air wetness, replace the cover on the pail when not proactively using it.
For a fiberglass surface, it's recommended to roughen or sand the area initially for better adhesion.: Remember that curing times can vary depending upon the temperature level and moisture levels.: If the finish starts to skin over in the container, merely eliminate this layer and mix well prior to continuing your application.
Rv Roof Replacement Diamond Bar, CA
: Correctly saved, the covering has a service life of 2 years, enabling future use if needed. We wait our item with a 100% Lifetime Warranty, providing you peace of mind with your acquisition. That's just how easy it is to repair your roof covering and forget doing roofing upkeep ever before once more.
If the water is going into past the above things they may require to be gotten rid of and have the putty tape replaced to stop water damages. ***(Added labor possibly required for replacement of sunlight damaged items or putty tape failure.) A follow-up inspection is required within 90-days of the finished service.
Rv Roof Repair Diamond Bar, CARubber Roofing For Campers Diamond Bar, CA
Rv Rubber Roof Replacement Cost Diamond Bar, CA
Roof Repair For Rv Diamond Bar, CA
Rubber Roofing For Rv Diamond Bar, CA
Resealing Rv Roof Diamond Bar, CA
Class C Rv Roof Repair Diamond Bar, CA
Rv Roof Repair Diamond Bar, CA
Replace Rv Roof Diamond Bar, CA
Rv Roof Replacement Diamond Bar, CA
Rv Roof Repair Diamond Bar, CA
Rv Rubber Roof Maintenance Diamond Bar, CA
Rubber Roofing For Campers Diamond Bar, CA
Rv Trailer Roof Repair Diamond Bar, CA
Repair Rv Roof Leak Diamond Bar, CA
Rv Roof Repair Service Near Me Diamond Bar, CA
Epdm Rv Roof Repair Diamond Bar, CA
Rv Roof Repair Near Me Diamond Bar, CA
Rv Roof Repair Diamond Bar, CA
Repair Rv Roof Leak Diamond Bar, CA
Rv Roof Leak Repair Near Me Diamond Bar, CA
Epdm Rv Roof Repair Diamond Bar, CA
Rv Rubber Roof Replacement Diamond Bar, CA
Epdm Rv Roof Repair Diamond Bar, CA
Rubber Roof Installation Diamond Bar, CA
Rv Rubber Roof Replacement Diamond Bar, CA
Rubber Roofing For Rv Diamond Bar, CA
Rubber Roofing For Rv Diamond Bar, CA
Rv Roof Repair Service Near Me Diamond Bar, CA
Rv Trailer Rubber Roof Repair Diamond Bar, CA
Rv Rubber Roof Replacement Diamond Bar, CA
Rv Fiberglass Roof Repair Diamond Bar, CA
Rv Trailer Roof Repair Diamond Bar, CA
Roof Repair For Rv Diamond Bar, CA
Rubber Roof For Camper Diamond Bar, CA
Rubber Roofing For Campers Diamond Bar, CA
Rv Rubber Roof Maintenance Diamond Bar, CA
Rv Trailer Roof Repair Diamond Bar, CA
Rubber Roofing For Rv Diamond Bar, CA
Rv Roof Repair Fiberglass Diamond Bar, CA
Rv Rubber Roof Replacement Diamond Bar, CA
Rubber Roofing For Campers Diamond Bar, CA
Rv Rubber Roof Replacement Cost Diamond Bar, CA
Epdm Rv Roof Repair Diamond Bar, CA
Rv Slide Out Roof Repair Diamond Bar, CA
Rubber Roof For Rv Diamond Bar, CA
Rv Rubber Roof Maintenance Diamond Bar, CA
Rv Rubber Roof Replacement Diamond Bar, CA
Resealing Rv Roof Diamond Bar, CA
Class C Rv Roof Repair Diamond Bar, CA
Rubber Roof Installation Diamond Bar, CA
Rv Trailer Roof Repair Diamond Bar, CA
Rv Roof Leak Repair Near Me Diamond Bar, CA
Repair Rv Roof Leak Diamond Bar, CA
Rubber Roof Installation Diamond Bar, CA
Rv Trailer Roof Repair Diamond Bar, CA
Roof Repair For Rv Diamond Bar, CA
Motorhome Roof Replacement Diamond Bar, CA
Rv Roof Repair Near Me Diamond Bar, CA
Rv Trailer Roof Repair Diamond Bar, CA
Repair Rv Roof Diamond Bar, CA
Replace Rv Roof Diamond Bar, CA
Class C Rv Roof Repair Diamond Bar, CA
Rv Roof Repair Fiberglass Diamond Bar, CA
Rubber Roof For Camper Diamond Bar, CA
Rv Roof Repair Near Me Diamond Bar, CA
Rv Roof Replacement Diamond Bar, CA
Rv Roof Repair Diamond Bar, CA
Rv Roof Leak Repair Diamond Bar, CA
Rv Fiberglass Roof Repair Diamond Bar, CA
Roof Repair For Rv Diamond Bar, CA
Rv Roof Repair Near Me Diamond Bar, CA
Rv Roof Leak Repair Near Me Diamond Bar, CA
Rubber Roofing For Campers Diamond Bar, CA
Rv Roof Replacement Diamond Bar, CA
Rubber Roof Installation Diamond Bar, CA
Rubber Roof For Camper Diamond Bar, CA
Rv Rubber Roof Replacement Cost Diamond Bar, CA
In My Area Seo Agencies Diamond Bar, CA
Near Seo Pricing Diamond Bar, CA
OCRV Center
Table of Contents
- – Rubber Roofing For Rv Diamond Bar, CA
- – OCRV Center
- – Best Rv Roof Repair Diamond Bar, CA
- – Rv Rubber Roof Replacement Diamond Bar, CA
- – Rv Roof Leak Repair Diamond Bar, CA
- – Rubber Roof Installation Diamond Bar, CA
- – Rubber Roofing For Rv Diamond Bar, CA
- – Repair Rv Roof Leak Diamond Bar, CA
- – Rubber Roof For Rv Diamond Bar, CA
- – Roof Repair For Rv Diamond Bar, CA
- – Rubber Roof Installation Diamond Bar, CA
- – Rv Roof Leak Repair Near Me Diamond Bar, CA
- – Motorhome Roof Replacement Diamond Bar, CA
- – Repair Rv Roof Diamond Bar, CA
- – Rv Roof Replacement Diamond Bar, CA
- – OCRV Center
Latest Posts
La Canada Flintridge Swamp Cooler Repair Near Me
Air Conditioning Maintenance Near Me Los Angeles
Residential Hvac Near Me Monterey Park
More
Latest Posts
La Canada Flintridge Swamp Cooler Repair Near Me
Air Conditioning Maintenance Near Me Los Angeles
Residential Hvac Near Me Monterey Park