All Categories
Featured
Table of Contents
- – Rv Paint Shops Near Me Rowland Heights, CA
- – OCRV Center
- – Class A Rv Custom Paint And Repair Rowland Hei...
- – Motorhome Painting Near Me Rowland Heights, CA
- – Motorhome Painting Near Me Rowland Heights, CA
- – Painting Fiberglass Motorhome Rowland Heights...
- – Rv Painting Rowland Heights, CA
- – Rv Paint Job Rowland Heights, CA
- – Painting Rv Exterior Rowland Heights, CA
- – Painting Rv Walls Rowland Heights, CA
- – Paint Fiberglass Rv Rowland Heights, CA
- – Custom Rv Paint Rowland Heights, CA
- – Custom Rv Paint Jobs Rowland Heights, CA
- – Rv Painting Rowland Heights, CA
- – Rv Painter Rowland Heights, CA
- – OCRV Center
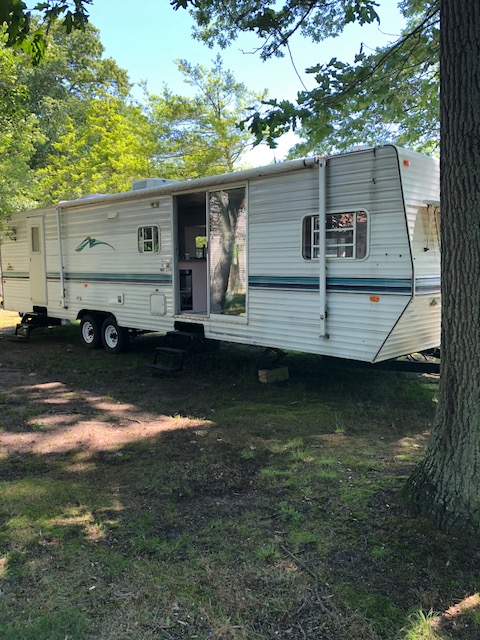
Rv Paint Shops Near Me Rowland Heights, CA
Primer is important for making sure that your paint will certainly stick and last longer on the walls. Be sure to cover all edges and sides equally with primer and enable it to dry totally before proceeding onto the next action. Use a great guide like Gripper or Kilz Attachment. Apply 1-2 coats of guide on all the walls that you will certainly be applying shade.
Preferably, attempt not to overlap areas as much as possible; instead, make use of long strokes in one direction up until you end up each wall surface section prior to moving onto one more one. You may find it valuable to separate each wall right into areas while painting to make sure that everything looks also when done drying out in the future.
Class A Rv Custom Paint And Repair Rowland Heights, CA
Again, wait 24-48 hours, and when the second layer is completely dry, make certain to gently sand and wipe down in between the layers. Get top quality paint. At least an eggshell or satin finish is advised. Use a brush to obtain in the corners of the walls and make use of 3/8 nap rollers to use many of the paint.
Thankfully, Pleased Glamper Carbon monoxide is a specialist in all points DIY motor home improvement and has several guides to assist with your next job. Not prepared to put the motor home valances back up? Update your motor home home window treatments with do it yourself curtains. Love the appearance of shiplap however not the cost tag? Try this $1 Con artist Shiplap for a timeless appearance.
Repainting your RV? Inspect out this step-by-step overview on how to paint Recreational vehicle cabinets and transform your Recreational vehicle by painting your Recreational vehicle cabinet doors!
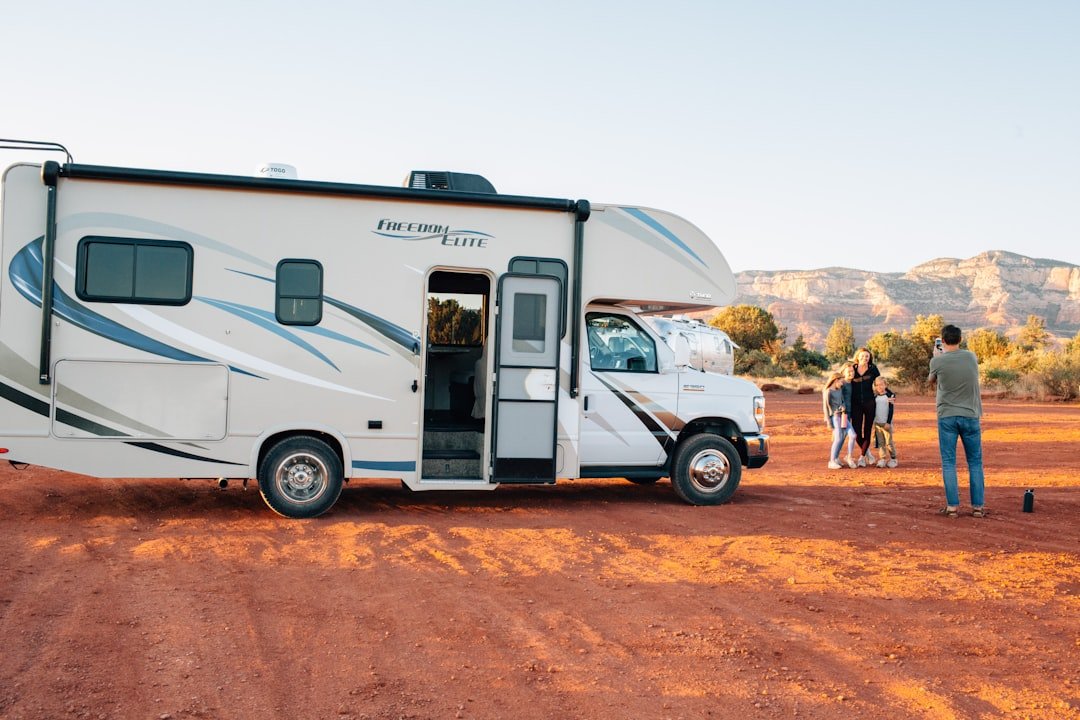
Motorhome Painting Near Me Rowland Heights, CA
Repainting your recreational vehicle can revive an older vehicle and provide it a fresh, upgraded appearance. Here's exactly how to repaint your recreational vehicle! The kind of paint you select will certainly rely on the product of your recreational vehicle's exterior. For aluminum or fiberglass Motor homes, automotive-grade urethane or acrylic enamel paint functions best due to the fact that it's long lasting and weather-resistant.
Beginning by thoroughly washing the RV to eliminate any type of dust, grease, or crud that could affect paint bond. Pay additional focus to any kind of locations with rust or existing paint chipsthese need to be sanded down till smooth.
Motorhome Painting Near Me Rowland Heights, CA
Use an even layer of guide utilizing a paint sprayer or roller. Job in sections to guarantee total protection and enable the guide to dry according to the maker's guidelines.
With the guide completely dry and smooth, it's time to use the paint. Operating in a well-ventilated area, use the paint making use of long, even strokes with a sprayer or roller. Begin from the top of the RV and function your method down, covering one side each time. If you're utilizing a sprayer, hold it regarding a foot away from the surface area and relocate stable passes, overlapping each pass somewhat for also protection.
Apply the paint in slim layers to prevent drips, and let each layer completely dry prior to using the following. The majority of RVs will require 2 or three layers for complete protection. Allow appropriate drying out time in between coats as advised by the paint manufacturer. This will aid avoid streaking and ensure a smooth, sturdy surface.
Painting Fiberglass Motorhome Rowland Heights, CA
A clear coat supplies included security and a glossy finish. When the last layer of paint is completely dry, apply a clear urethane overcoat to secure the paint and include a layer of protection against the components. Utilize the same application approach similar to the paint, operating in also, overlapping strokes.
Permit the clear layer to treat completely, which may take 24 hr or more, depending upon weather condition problems and the item you use. When the clear layer is dry, eliminate all painter's tape and ground cloth carefully. Be careful around the edges to avoid peeling off paint in addition to the tape.
As soon as the paint has actually cured totally, wash the recreational vehicle delicately to get rid of any type of continuing to be dust or deposit from the paint process. To maintain your RV looking its finest, wash it regularly with a gentle cleaner and prevent abrasive products that could harm the paint. Waxing the outside a few times a year can help preserve the paint's shine and provide added defense.
Painting your recreational vehicle can transform its appearance and secure it from the wear and tear of the road. With correct preparation and patience, you can achieve a professional-looking coating that makes your RV appearance terrific and shields it for much more experiences ahead. Whether hitting the open roadway or setting up camp, a fresh coat of paint will make your RV really feel like new once again.
Rv Painting Rowland Heights, CA
The kind of RV outside upgrade called for will depend upon aspects like the RV's kind and size, the extent of any damage, and the problem of the decals. Right here are some essential considerations to examine before beginning the task: Motorhome RVs are categorized right into three primary courses: A, B, and C.
The surface, materials, and structural information of your RV will certainly determine the intricacy of the work. Discolored or broken decals and graphics are clear indicators that substitutes are required. Updating old stickers with fresh ones can dramatically invigorate the appearance of your RV and offer it a brand-new feel.
If the paint looks faded, reveals indications of rust, or just no longer interest you, take into consideration a fresh layer of paint. A full-body repaint not just improves your motor home's visual appeal however also enhances its overall worth. Once you understand what your recreational vehicle requires, you have to make a decision whether it needs do it yourself remediation job or it's something you can delegate the pros.
For the best outcomes, take into consideration making use of a power washer to make certain a deep tidy. As soon as the surface area is clean and completely dry, apply a high-quality wax to restore the paint's luster and secure it from the elements.
Rv Paint Job Rowland Heights, CA
While DIY can in some cases save cash, it may not be the ideal technique for complicated Recreational vehicle remodelings. Professionals like Leisure Coachworks have the know-how to change your Recreational vehicle's outside with a total makeover.
Making use of top-tier devices like advanced paint sprayers, our experts achieve a smooth, flawless outside that will certainly stand the examination of time. When it comes to replacing your Motor home stickers, you have two choices: You can get original RV stickers from suppliers that specialize in Recreational vehicle components supply.
Painting Rv Exterior Rowland Heights, CA
This site uses cookies to boost your experience while you navigate via the site. Paint Motorhome Exterior Rowland Heights. Out of these, the cookies that are categorized as required are stored on your browser as they are vital for the working of fundamental functionalities of the internet site. We additionally make use of third-party cookies that help us analyze and understand exactly how you use this internet site
You likewise have the choice to opt-out of these cookies. Yet choosing out of a few of these cookies might impact your surfing experience.
It's an olden concern. Do you take your recreational vehicle to a customized paint store or go with a DIY motor home paint job? As a recreational vehicle proprietor, it's a question that you at some point need to deal with when your motor home's outside starts to put on. There's no right or wrong response when it involves selecting an expert motor home paint work or going the DIY paint route.
Painting Rv Walls Rowland Heights, CA
One of the most likely reason a person picks to go DIY is due to the price element. Relying on the size and design, the ordinary motor home paint work can range from $5,000-$15,000+. Painting a recreational vehicle by yourself, nevertheless, can be as cheap as $300 if you want to spend the moment and initiative.
If you can spare the joint oil, you can do the labor on your own and conserve money in the procedure. With assistance from the web, you can find out to accomplish anything. There's a wide range of knowledge to assist you detailed through the process of painting your recreational vehicle. You can bring up a composed guide on your phone (or publish them out) or you can follow together with a YouTube video clip.
Paint Fiberglass Rv Rowland Heights, CA
While it might seem discouraging to filter with, with persistence and decision, you can make use of these sources to assist you transform your RV exterior. When you decide to paint your motorhome on your own, you have total control over what takes place. You choose what sort of paint and products are used.
There's additionally a sense of accomplishment that comes with taking on a large Do it yourself project. You can not defeat the sensation of standing back and really feeling satisfaction in the difficult work you have actually put in.
When you go to a custom paint shop, there's an expectation in the high quality of the last product. That expectation comes from the experience and resources that a paint store has to supply. Customized paint shops include employees that are learnt a process that's been executed countless times. That process has been nailed down right into a reliable regimen for the shop employees.
Custom Rv Paint Rowland Heights, CA
If you aren't the creative kind, a RV paint shop will certainly have lots of durable layouts and colors to choose from. They'll function with you to obtain the finest appearance out of your Motor home.
[] While do it yourself is a cost-saving action, it will certainly occupy a good portion of time to complete painting your motor home. Estimated time to finish a DO IT YOURSELF RV task can occupy to 30 hours or even more. Those that work full time might discover it hard to discover the complimentary time beyond the weekend break to undertake painting their mobile home.
Custom Rv Paint Jobs Rowland Heights, CA
Ultimately, the decision is your own on just how to take care of your Recreational vehicle. If you choose to obtain your paint done properly and are looking for a costs, premium service, check out CDI Customized Paint today and get a quote.
A great deal of things have happened to, in, around this front corner. And therefore, it doesn't look that terrific any longer. There's places where the paint is simply simple gone. So if we go to touch this up, we're up versus a pair things. This is white, however is it what type of white? Can I simply go and obtain a canister of aerosol paint from an equipment store and spray that? Possibly not.
And if this camper lived outside, it's got climate and sunlight and all type of things taking place. So right here is this crazy trendy point. The insane cool thing is locations that do a whole lot of auto body work, as you could imagine, are often trying to match existing and older paint.
Rv Painting Rowland Heights, CA
You take a portion of something. You go to a home center. They placed the chunk of something in a scanner, and they match that color. Now, the difference is when you find the best place, you call 'em, and they put a scanner on the camper. So at an auto body place, they 'd be placing it on an auto, and they do the exact same thing.

So the way that this benefited me was made a call, and it was an automobile body location that referred me to a paint store. A service individual from the paint shop pertained to the camper, and they put the scanner exactly on the system. And I was searching for scans of the white, and afterwards there's type of a blue and a teal, and I desired paint so I might touch all of those up.
We can match heaven to a 7," or whatever. So they can offer you a read in advance on how excellent a color suit they believe they're gon na be able to offer you. From there, at the certain place I make use of, they had the ability to provide me with rattle cans, spray can that remain in the shades I'm utilizing.
Rv Painter Rowland Heights, CA
Following thing for me, I'm gon na mask this off and this and this so we don't obtain paint where we do not want it. And after that return with the white and start filling out these bad spots. Shake it up, infant, now Adhere to the directions. If it's a rattle can and it says, "Shake momentarily after the ball actions," shake for a minute after the sphere relocations.
Obtained windows open at that end. I've obtained a great deal of air moving with here.
And simply prior to placing the masking tape on, cleaning every little thing down with warm soapy water is gon na get the deposit off of there so that the paint has every chance to stick. Now, as I spray, one of the things to enjoy for is on the locations really close to the corner, we need a reasonable bit of item there to make sure we obtain this covered.
It's actually best up right here that it looks the grossest. As I function away from that corner, I'm gon na feather it a little bit by relocating away from the camper and then additionally possibly not holding the button down, but just kinda giving a ruptured of paint, a little brief burst of paint instead of a complete.
Painting Rv Exterior Rowland Heights, CARv Paint And Repair Rowland Heights, CA
Motorhome Painting Rowland Heights, CA
Motorhome Paint Repair Rowland Heights, CA
Paint Fiberglass Rv Rowland Heights, CA
Custom Rv Paint Rowland Heights, CA
Class A Rv Custom Paint And Repair Rowland Heights, CA
Custom Painted Motorhomes Rowland Heights, CA
Rv Paint And Repair Rowland Heights, CA
Motorhome Custom Paint Rowland Heights, CA
Rv Paint And Body Shops Near Me Rowland Heights, CA
Painting Fiberglass Motorhome Rowland Heights, CA
Custom Rv Paint Jobs Rowland Heights, CA
Motorhome Paint Shops Rowland Heights, CA
Painting Rv Exterior Rowland Heights, CA
Motorhome Custom Paint Jobs Rowland Heights, CA
Motorhome Custom Paint Jobs Rowland Heights, CA
Rv Painter Rowland Heights, CA
Custom Motorhome Paint Jobs Rowland Heights, CA
Class A Rv Custom Paint And Repair Rowland Heights, CA
Rv Paint And Repair Rowland Heights, CA
Rv Painting Near Me Rowland Heights, CA
Motorhome Paint Shops Rowland Heights, CA
Motorhome Custom Paint Rowland Heights, CA
Class A Rv Custom Paint And Repair Rowland Heights, CA
Custom Rv Paint Rowland Heights, CA
Rv Paint And Body Shops Near Me Rowland Heights, CA
Painting Rv Rowland Heights, CA
Painting Rv Exterior Rowland Heights, CA
Rv Painting Near Me Rowland Heights, CA
Rv Painting Rowland Heights, CA
Custom Rv Paint Jobs Rowland Heights, CA
Motorhome Painting Near Me Rowland Heights, CA
Painting Fiberglass Motorhome Rowland Heights, CA
Custom Motorhome Paint Jobs Rowland Heights, CA
Rv Painting Near Me Rowland Heights, CA
Custom Rv Paint Jobs Rowland Heights, CA
Motorhome Painting Rowland Heights, CA
Rv Paint Job Rowland Heights, CA
Motorhome Custom Paint Jobs Rowland Heights, CA
Painting Rv Walls Rowland Heights, CA
Painting An Rv Rowland Heights, CA
Custom Painted Motorhomes Rowland Heights, CA
Rv Paint Shops Near Me Rowland Heights, CA
Rv Painting Rowland Heights, CA
Painting Fiberglass Motorhome Rowland Heights, CA
Rv Paint Shops Near Me Rowland Heights, CA
Custom Painted Motorhomes Rowland Heights, CA
Painting Rv Walls Rowland Heights, CA
Custom Motorhome Paint Jobs Rowland Heights, CA
Rv Exterior Paint Rowland Heights, CA
Rv Paint And Body Shops Near Me Rowland Heights, CA
Painting Rv Walls Rowland Heights, CA
Painting Rv Exterior Rowland Heights, CA
Rv Paint And Repair Rowland Heights, CA
Rv Paint Rowland Heights, CA
Custom Rv Paint Rowland Heights, CA
Painting Rv Walls Rowland Heights, CA
Class A Rv Custom Paint And Repair Rowland Heights, CA
Custom Motorhome Paint Jobs Rowland Heights, CA
Rv Exterior Paint Rowland Heights, CA
Painting Rv Walls Rowland Heights, CA
Custom Rv Paint Jobs Rowland Heights, CA
Painting Rv Rowland Heights, CA
Rv Paint Shops Near Me Rowland Heights, CA
Rv Paint Shops Near Me Rowland Heights, CA
Motorhome Custom Paint Rowland Heights, CA
Painting Rv Exterior Rowland Heights, CA
Rv Paint Rowland Heights, CA
Motorhome Painting Rowland Heights, CA
Rv Paint Repair Rowland Heights, CA
Painting Rv Exterior Rowland Heights, CA
Painting Fiberglass Motorhome Rowland Heights, CA
Class A Rv Custom Paint And Repair Rowland Heights, CA
Rv Paint And Repair Rowland Heights, CA
Motorhome Paint Repair Rowland Heights, CA
Rv Painter Rowland Heights, CA
Rv Paint And Body Shops Near Me Rowland Heights, CA
Close To Me Seo Companies Rowland Heights, CA
Find A Good Local Seo Plans Rowland Heights, CA
OCRV Center
Table of Contents
- – Rv Paint Shops Near Me Rowland Heights, CA
- – OCRV Center
- – Class A Rv Custom Paint And Repair Rowland Hei...
- – Motorhome Painting Near Me Rowland Heights, CA
- – Motorhome Painting Near Me Rowland Heights, CA
- – Painting Fiberglass Motorhome Rowland Heights...
- – Rv Painting Rowland Heights, CA
- – Rv Paint Job Rowland Heights, CA
- – Painting Rv Exterior Rowland Heights, CA
- – Painting Rv Walls Rowland Heights, CA
- – Paint Fiberglass Rv Rowland Heights, CA
- – Custom Rv Paint Rowland Heights, CA
- – Custom Rv Paint Jobs Rowland Heights, CA
- – Rv Painting Rowland Heights, CA
- – Rv Painter Rowland Heights, CA
- – OCRV Center
Latest Posts
Eastvale Rv Trailer Roof Repair
Ontario Motorhome Air Conditioner Repair
Placentia Replace Rv Flooring
More
Latest Posts
Eastvale Rv Trailer Roof Repair
Ontario Motorhome Air Conditioner Repair
Placentia Replace Rv Flooring