All Categories
Featured
Table of Contents
- – Rv Carpet Installation Mira Loma, CA
- – OCRV Center
- – Awnings For Rv Mira Loma, CA
- – Awnings For Trailers Mira Loma, CA
- – Replacement Rv Windows Mira Loma, CA
- – Rv Dining Table Mira Loma, CA
- – Rv Couch Bed Mira Loma, CA
- – Rv Carpet Replacement Mira Loma, CA
- – Awnings For Rv Mira Loma, CA
- – Rv Dinette Booth Mira Loma, CA
- – Rv Interior Furniture Mira Loma, CA
- – Rv Sofa Sleeper Mira Loma, CA
- – Rv Sofas Mira Loma, CA
- – Awnings For Rv Mira Loma, CA
- – OCRV Center
Rv Carpet Installation Mira Loma, CA
A major benefit to GCI Outdoor is that they have a 1 year service warranty on their chairs. This is substantial for us. We utilize our chairs at all times, and they are out in all type of weather condition, so we like knowing that we are covered if anything takes place to them.
I'm mosting likely to look at a few of the features of each chair we have actually possessed so you can make an informed decision as to which one would certainly be the best suitable for YOU!.
I am basing our remedy on numerous others who claim they are fantastic and I have actually not seen one grievance about them. This truth contrasts to an almost vast number of grievances about the recliners (I make use of that word freely).
It simply is so wrong. I understand with other products, like television, we would go to the maker for resolution. In this circumstances, Heartland set the specifications and selected a vendor to satisfy those specifications so I believe they should get involved in a service.
Awnings For Rv Mira Loma, CA
Maybe that's the method, I will just quit and disappear. Not ready to surrender yet. I'm surprised that with all the complaints, Heartland isn't all over this due to the fact that it's been going on for a lengthy time. All the advertising and marketing they do is definitely compromised by an inferior product causing numerous problems.
The wide array of outdoor chairs offered ensures that there will be one to fit your needs and design. There are countless versions of exterior collapsible reclining chairs, including the Zero Gravity series which supports you while being really lightweight. The Barbecue Time Chairs are ideal if you wish to keep accessories or other things, such as drinks or sunglasses, close by.
Awnings For Trailers Mira Loma, CA
When choosing chairs or any kind of other type of outdoor motor home furniture, it is very important to remember the number of people existing and the choices they may have. The available storage room is additionally good to consider, as various kinds of chairs will fold or collapse to varying dimensions.
While a lot of chairs can bring larger lots than they promote, their lifetime will certainly be greatly decreased. And nobody desires to be the one to come down on the ground if a chair stops working and damages. Some chairs may be too little and even too large, making it a good idea to think about the dimensions for the chairs readily available.
As a result of the limited space that you have available within your RV, you have to select chairs that can be folded down to a compact size to correctly fit your assigned storage area. While some exterior chairs are really comfy and can stand up to the exterior components, they may still be rather large when folded up down.
Some exterior chairs even include a carrying bag, making it even simpler to maintain the chairs out of the method when not being used. Taking into consideration the rate tag of the chairs that you're interested in can aid make sure that you make a wise purchase. Depending on the variety of chairs that you require, you can be investing numerous dollars on these chairs.
Replacement Rv Windows Mira Loma, CA
For assistance when buying chairs to bring along in your motor home or any kind of other RV-related questions, please contact us. Outdoor Chairs Related Articles.
I hear you, Dan, we are taking a danger. I am basing our solution on numerous others who say they are terrific and I have actually not seen one problem concerning them. This reality contrasts to a virtually vast variety of grievances concerning the recliner chairs (I utilize that word freely). At least it's worth a shot before we pay out one more large amount for our own seating enjoyment.
Rv Dining Table Mira Loma, CA
We are likewise concerned about matching the natural leather. Thanks for your ideas (Mira Loma Rv Restoration Companies). I resemble Ange and starting to seem like the "b" word on this concern. It simply is so wrong. I understand with other items, like tv, we would certainly most likely to the producer for resolution. But in this circumstances, Heartland set the specifications and chosen a supplier to fulfill those specs so I believe they should join a service.
Possibly that's the approach, I will certainly simply give up and go away. I'm astonished that with all the complaints, Heartland isn't all over this because it's been going on for a long time.
We obtained 2 of our eating space chairs and changed with a footrest. High sufficient to rest at the table on, can save stuff under the pillow in package, and utilize it as a foot rest before the tacky Thomas Payne recliner chairs.
Rv Couch Bed Mira Loma, CA
A needed part of this website could not load. This might result from an internet browser extension, network issues, or internet browser setups. Please check your connection, disable any type of advertisement blockers, or try using a various web browser.
Right here's a recreational vehicle Do It Yourself tip to assist you protect your free standing dining room chairs to ensure they sit tight and don't crash anything during traveling. Over the past summertime, we purchased a 5th wheel that has a dining room with free-standing chairs. The previous owner (it's a three years of age rig) had not utilized it much and claimed he 'd never also seen any tie-down bands for the chairs.
Others report damages created by unsecured chairs throughout a panic-stop or mishap. The images show what we came up with: We leaned the chairs right into the table so that the chair backs touch the edge of the table, making sure the chair legs clear the wall surface and the sofa.
We made use of 2 noodles. The pieces might currently be slipped over the outer stiles of the chair backs as revealed to offer extra padding between the table and the chairs.
Rv Carpet Replacement Mira Loma, CA
The illustration tries to show the entire thing from the top of the table. You can see just how the Velcro band (in red) runs around the backs of of the chairs, after that under the table and around the center pedestal. There's one more band for the other pair of chairs, however I just revealed one for quality.
We 'd recommend you ensure that side is the one that comes in call with the table and chairs so there is no scraping of the surfaces. Ultimately, including a short strap at the top of each set of chairs, as displayed in the last picture, made whatever really secure and secure.
We made a decision to do it and we wanted something that would work and would certainly be low-cost and rather very easy to make use of. Both noodles and the Velcro straps cost us less than $30 and everything is lightweight and reusable. While you do need to crawl under the table a little bit to put the bands on, it's rather easy to do.
Awnings For Rv Mira Loma, CA
Now, honestly, I have not attempted it yet, yet it looks excellent, obtains excellent reviews and it would certainly be a great deal quicker to safeguard the chairs than using the noodles and Velcro straps. I do not recognize that it would certainly be anymore efficient, but definitely easier and no fret about where to save the noodles and straps.
The brace places on the table's center blog post and the hold-down bars fold versus the under side of the table when not in use. If you wish to take a more detailed look, there's information on the MORryde site, or here's a web link to the Chair Buddy on Amazon [associate link] where you can review some testimonials or perhaps get an established if you like what you see.
I'm starting to believe these foam noodles may join excellent ol' duct tape in the "don't leave home without it" group. We would certainly like to hear exactly how you protect things for traveling.
We're here to aid you make the most of your time. Whether you're intending an outdoor camping trip or an event, we have a large selection of camping devices, games, watercrafts, and areas to aid make your work a great deal simpler.
Rv Dinette Booth Mira Loma, CA
The center additionally provides both lengthy and short-term vehicle/RV storage space and mini storage space units. Product Expense Mini Storage Space (5' x 9') $45/month Back-In $45/month Pull-Thru $55/month Covered Area $65/month Medicine Creek Recreational vehicle Park is situated close to Fort Sill Golf Club.
As a short-term comfort repair, I purchased seat covers at Walmart. They hold the gel pads in position with no activity, they stay. I measured my Ford seats size from arm remainder to equip remainder at 26". I have actually observed in the 'shop4seats' website that some seats are 27" wide at the very same area.
Rv Interior Furniture Mira Loma, CA
The initial 2 DE Leon seats are 26" however the Venture seat # 5 is 27". Click on each seat and scroll down to check out the measurements and color/other options like heat, lumbar etc.
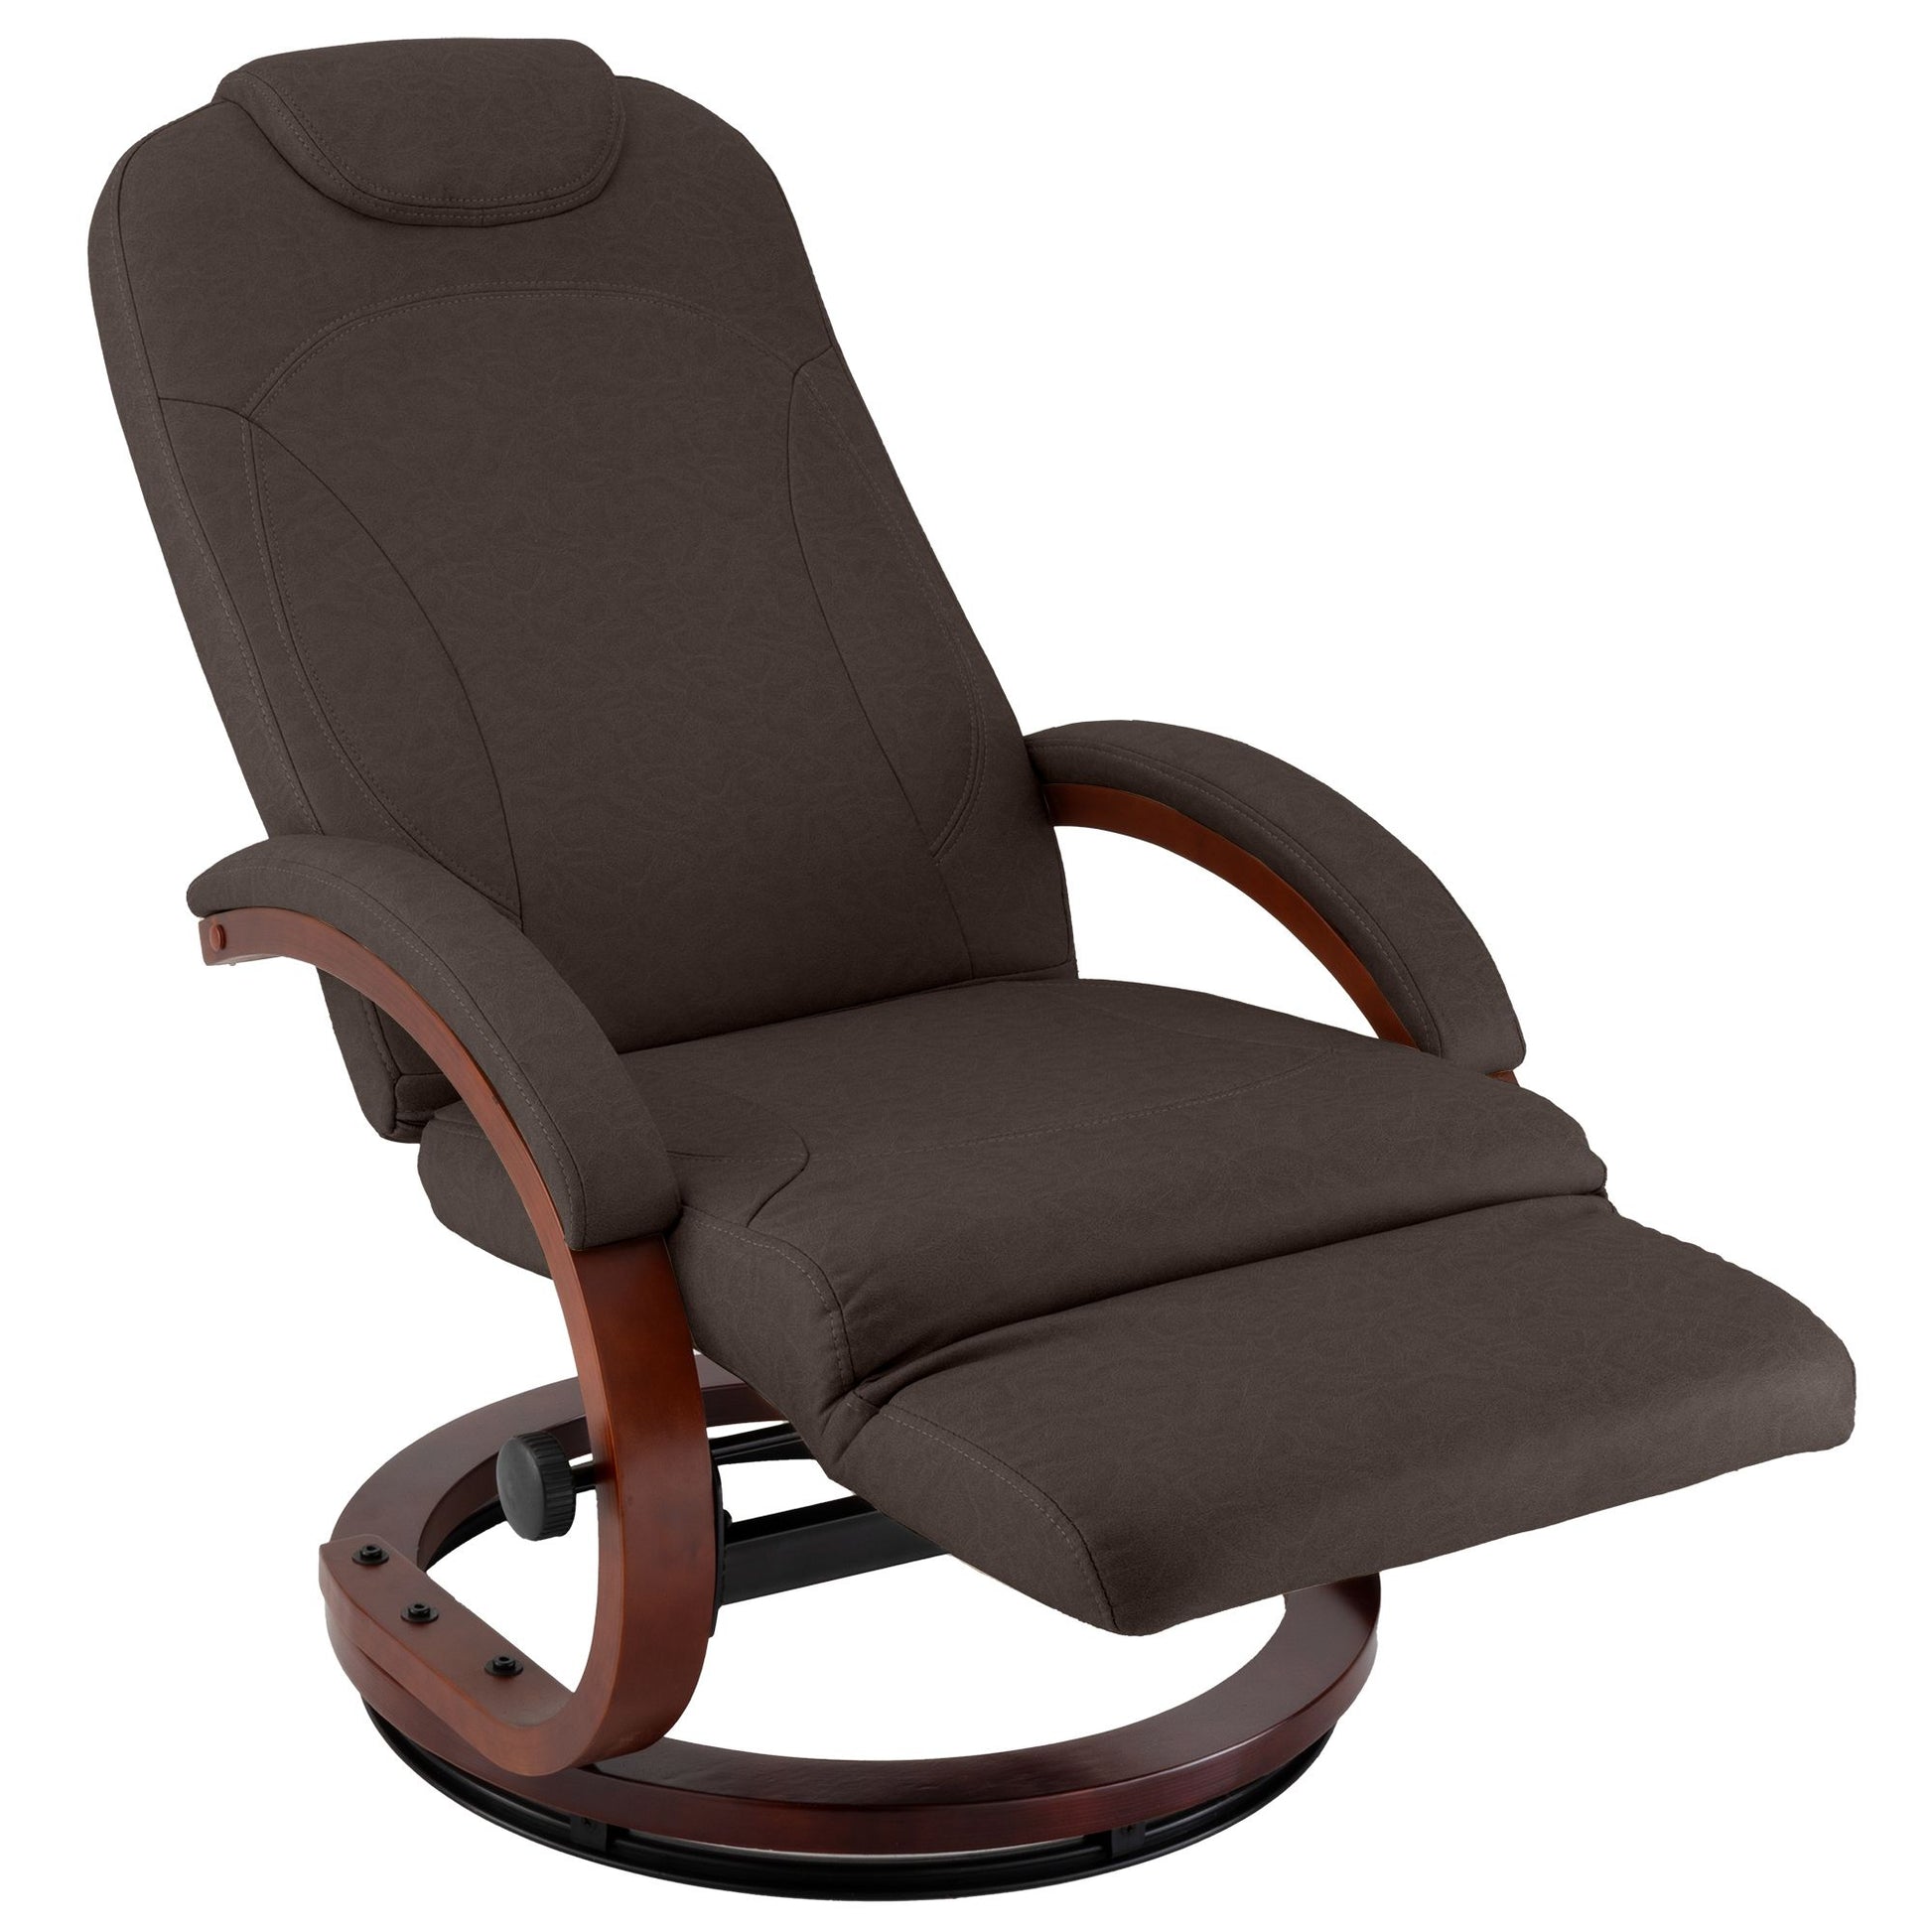
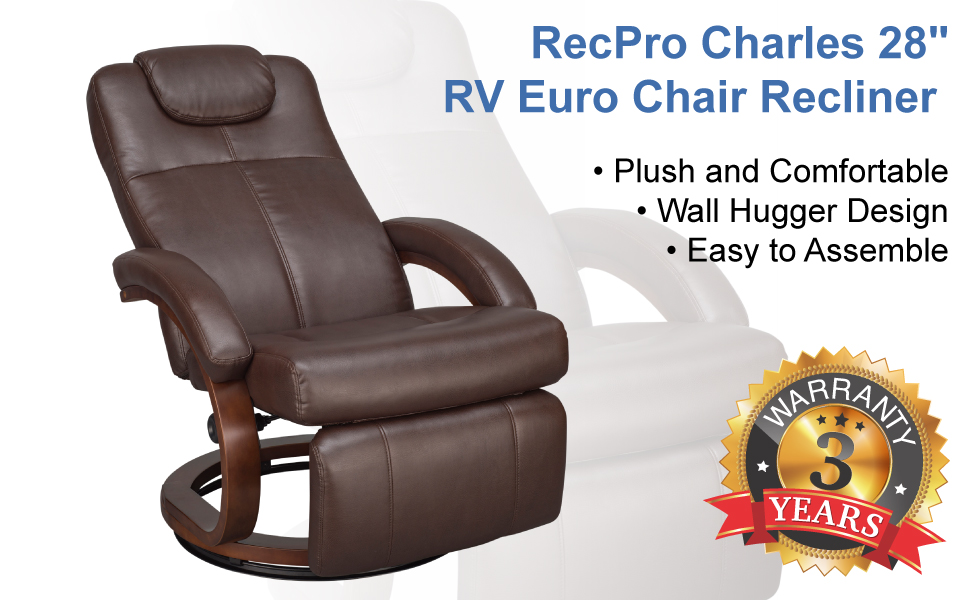
Recliners produced Recreational vehicles are additionally normally made up of two or three separate pieces, which makes them simpler to carry into your recreational vehicle. After assembly, these recliners are safeguarded to the real camper, so they won't move around or damage the inside when driving. Some of one of the most prominent sorts of RV reclining chairs are Swivel Rockers, Euro Recliners and Wall Surface Huggers.
Known as a zero-wall recliner, a wall hugger recliner requires extremely little wall surface clearance to recline. Some motor home wall hugger recliners, like the ones from Lambright, need as little as 3 inches of wall surface clearance. These motor home chairs recline with just a few inches of clearance because as the rear of the chair drops, the seat progresses.
RV cinema seats and couches can come equipped with this attribute as well.
Rv Sofa Sleeper Mira Loma, CA
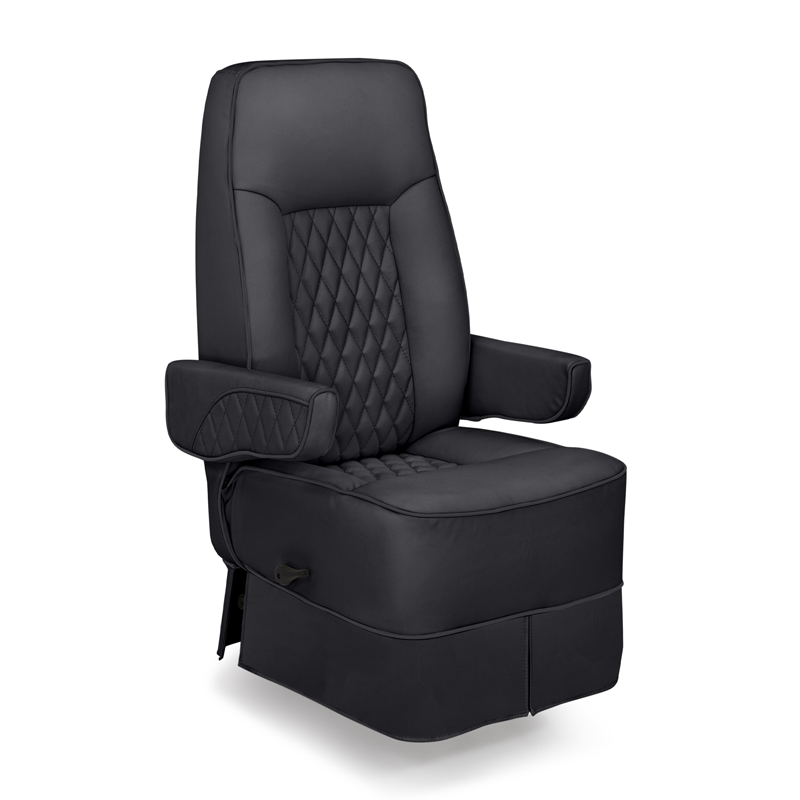
Our high-grade Lambright Convenience Chairs are perfect for your RV. Lambright is a brand devoted to craftmanship and convenience while still offering you a stylish appearance and area saving technology so you can get one of the most out of your money. At Bradd and Hall, we supply a wide variety of Lambright choices so we understand there will be something perfect for you.
If you are trying to find a sofa, you can take a look at our Lambright Sofa Sleeper or maybe the Lambright Harrison Reclining Sofa. Desiring to loosen up comfortably? Lambright also has premium cinema seating excellent for the film enthusiast on the go. With such a wide array to pick from, you might have some questions.
The center also uses both lengthy and temporary vehicle/RV storage and mini storage devices. Thing Price Mini Storage Space (5' x 9') $45/month Back-In $45/month Pull-Thru $55/month Covered Room $65/month Medicine Creek RV Park is situated close to Fort Sill Golf Club.
As a momentary comfort repair, I got seat covers at Walmart. I determined my Ford seats width from arm rest to equip rest at 26".
Rv Sofas Mira Loma, CA
The first 2 DE Leon seats are 26" but the Endeavor seat # 5 is 27". Click on each seat and scroll down to see the measurements and color/other choices like heat, lumbar etc.
Reclining chairs created Recreational vehicles are also typically made up of two or 3 different items, which makes them much easier to lug into your recreational vehicle. After assembly, these recliner chairs are secured to the real camper, so they won't move or damage the inside when driving. Several of the most preferred kinds of RV recliner chairs are Swivel Rockers, Euro Recliners and Wall Surface Huggers.
Likewise recognized as a zero-wall recliner, a wall hugger recliner requires extremely little wall surface clearance to recline. Some recreational vehicle wall hugger recliners, like the ones from Lambright, require just 3 inches of wall clearance. These motor home chairs recline with just a few inches of clearance because as the back of the chair goes down, the seat moves on.
Recreational vehicle movie theater seating and sofas can come geared up with this attribute.
Awnings For Rv Mira Loma, CA
Our high-quality Lambright Convenience Chairs are excellent for your motor home. Lambright is a brand dedicated to craftmanship and convenience while still supplying you an elegant appearance and space conserving technology so you can obtain the most out of your money. At Bradd and Hall, we provide a large array of Lambright alternatives so we know there will be something excellent for you.
OCRV Center
Address: 23281 La Palma Ave Yorba Linda, CA 92887Phone: (714) 909-1444
Email: [email protected]
OCRV Center
If you are searching for a sofa, you can look into our Lambright Couch Sleeper or maybe the Lambright Harrison Reclining Couch. Intending to kick back comfortably? Lambright likewise has costs cinema seating excellent for the movie lover on the move. With such a wide array to pick from, you might have some inquiries.
Rv Sofa Beds Mira Loma, CARv Refrigerator Replacement Mira Loma, CA
Motorhome Carpets Mira Loma, CA
Awning Installation Mira Loma, CA
Awnings For Trailers Mira Loma, CA
Awning Installation Mira Loma, CA
Rv Couch Mira Loma, CA
Replacement Rv Refrigerator Mira Loma, CA
Rv Refrigerator Replacement Mira Loma, CA
Motorhome Carpets Mira Loma, CA
Remodeling Rv Mira Loma, CA
Rv Sofas Mira Loma, CA
Rv Replacement Furniture Mira Loma, CA
Rv Sofa Sleeper Mira Loma, CA
Remodeling Rv Mira Loma, CA
Rv Microwave Replacement Mira Loma, CA
Rv Refrigerator Replacement Mira Loma, CA
Motorhome Carpets Mira Loma, CA
Rv Dinette Booth Mira Loma, CA
Rv Sofa Sleeper Mira Loma, CA
Awning Installation Mira Loma, CA
Motorhome Carpets Mira Loma, CA
Replacement Windows For Rv Mira Loma, CA
Replacement Windows For Rv Mira Loma, CA
Replacement Rv Refrigerator Mira Loma, CA
Rv Carpet Installation Mira Loma, CA
Rv Couch Mira Loma, CA
Rv Dinette Table Mira Loma, CA
Motorhome Carpets Mira Loma, CA
Rv Microwave Replacement Mira Loma, CA
Rv Replacement Furniture Mira Loma, CA
Rv Couch Mira Loma, CA
Rv Replacement Furniture Mira Loma, CA
Rv Dining Table Mira Loma, CA
Rv Restoration Companies Mira Loma, CA
Replacement Windows For Campers Mira Loma, CA
Awnings For Rv Mira Loma, CA
Rv Carpet Replacement Mira Loma, CA
Rv Upholstery Mira Loma, CA
Replacement Windows For Campers Mira Loma, CA
Awnings For Trailers Mira Loma, CA
Rv Carpet Installation Mira Loma, CA
Replace Rv Flooring Mira Loma, CA
Rv Sofa Beds Mira Loma, CA
Replacement Rv Windows Mira Loma, CA
Rv Chairs Mira Loma, CA
Rv Restoration Companies Mira Loma, CA
Awning Installation Mira Loma, CA
Rv Dinette Booth Mira Loma, CA
Rv Sofa Beds Mira Loma, CA
Rv Dinette Booth Mira Loma, CA
Rv Carpet Installation Mira Loma, CA
Remodeling Rv Mira Loma, CA
Rv Sofas Mira Loma, CA
Motorhome Carpets Mira Loma, CA
Rv Sofa Beds Mira Loma, CA
Rv Couch Mira Loma, CA
Motorhome Carpets Mira Loma, CA
Rv Sofas Mira Loma, CA
Rv Couch Bed Mira Loma, CA
Replacement Rv Windows Mira Loma, CA
Rv Dining Table Mira Loma, CA
Rv Floor Replacement Mira Loma, CA
Awning Installation Mira Loma, CA
Rv Sofas Mira Loma, CA
Awnings For Trailers Mira Loma, CA
Replacement Rv Refrigerator Mira Loma, CA
Awnings For Rv Mira Loma, CA
Awning Installation Mira Loma, CA
Rv Microwave Replacement Mira Loma, CA
Rv Chairs Mira Loma, CA
Remodeling Rv Mira Loma, CA
Motorhome Carpets Mira Loma, CA
Rv Refrigerator Replacement Mira Loma, CA
Rv Restoration Companies Mira Loma, CA
Rv Floor Replacement Mira Loma, CA
Rv Dining Table Mira Loma, CA
Replacement Rv Refrigerator Mira Loma, CA
Finding A Good Seo Marketing Mira Loma, CA
Find Seo Management Mira Loma, CA
OCRV Center
Table of Contents
- – Rv Carpet Installation Mira Loma, CA
- – OCRV Center
- – Awnings For Rv Mira Loma, CA
- – Awnings For Trailers Mira Loma, CA
- – Replacement Rv Windows Mira Loma, CA
- – Rv Dining Table Mira Loma, CA
- – Rv Couch Bed Mira Loma, CA
- – Rv Carpet Replacement Mira Loma, CA
- – Awnings For Rv Mira Loma, CA
- – Rv Dinette Booth Mira Loma, CA
- – Rv Interior Furniture Mira Loma, CA
- – Rv Sofa Sleeper Mira Loma, CA
- – Rv Sofas Mira Loma, CA
- – Awnings For Rv Mira Loma, CA
- – OCRV Center
Latest Posts
Laguna Hills Vision Insurance For Seniors
Rancho Santa Margarita Key Man Insurance Vs Life Insurance
Buena Park Employee Benefits Consulting Company
More
Latest Posts
Laguna Hills Vision Insurance For Seniors
Rancho Santa Margarita Key Man Insurance Vs Life Insurance
Buena Park Employee Benefits Consulting Company