All Categories
Featured
Table of Contents
- – OCRV Center
- – Why Are RV Service Delays Getting Worse?
- – How Long Do RV Repairs Really Take in Southern...
- – What Causes RV Service Delays and Waiting Week...
- – RV Technician Shortage Explained
- – Dealer vs Independent RV Repair
- – How to Avoid RV Service Delays in Southern Cal...
- – Real Impact of RV Service Delays on Your Lifes...
- – RECT – Repair Event Cycle Time – The Metric Th...
- – Ready to End the Cycle of RV Service Delays?
- – Common Concerns About RV Service Delays and Ho...
- – Areas We Serve Throughout Southern California
- – We Can Help! Contact Us Today
- – OCRV Center
. Rv Service And Repair Near Me Villa Park
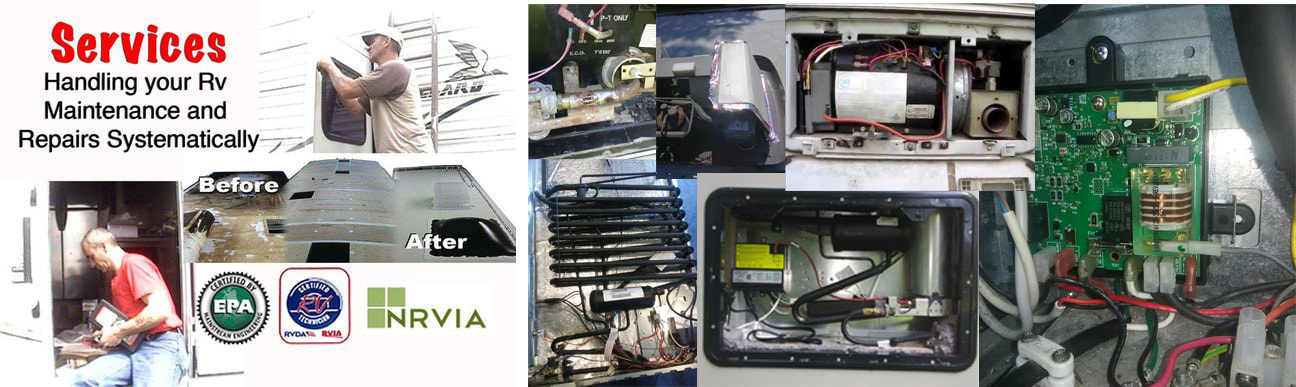
RV repair delays leave many owners frustrated when a simple repair turns into weeks of waiting for RV parts. You plan your next trip only to discover a leak, rattle, or malfunction that requires immediate attention. These RV repair delays create real stress as days stretch into weeks with limited communication and growing uncertainty. RV parts delays, RV technician shortage, and overloaded bays combine to extend repair event cycle time far beyond what most owners expect. Understanding the full picture helps you see why RV service delays occur and what actually shortens the wait.
The reality of waiting weeks for RV parts affects full-time RVers, families, snowbirds, and commercial fleet operators alike. When RV repair delays hit, travel plans collapse and daily routines get disrupted. Many ask how long does RV repair take only to hear vague answers that add more anxiety. A one-stop shop approach addresses these problems directly by handling everything from diagnosis to final testing in one convenient location.
Why Are RV Service Delays Getting Worse?
RV service delays continue to challenge owners because multiple factors stack together and slow every stage of the process. Technician shortage means fewer skilled hands available for the rising number of RVs on the road. Parts backorders turn routine fixes into extended downtime while warranty approvals add layers of paperwork that stretch timelines. Overloaded service bays during travel periods push even straightforward work further back on the schedule. These elements create the long waits that leave many feeling stuck and uncertain about their next adventure.
The growing RV technician shortage affects every repair type from basic maintenance to complex slide-out or electrical work. Demand rises faster than the supply of qualified technicians, which directly increases repair event cycle time. Parts shortages hit hardest on specialized components such as generator parts, solar system elements, and chassis repairs. Seasonal travel peaks make the situation worse as shops reach maximum capacity and waitlists grow longer.
Common components that cause the longest waits include slide-out seals, roof materials, and custom electrical parts. Summer travel season brings the heaviest volume while off-season periods still see steady demand from full-time RVers and snowbirds. Recognizing these patterns allows owners to plan ahead and avoid repeated disappointment when RV repair delays (Rv Service And Repair Near Me Villa Park) strike. RV maintenance performed regularly can catch many issues before they become major RV repair delays
These frustrations create stress and uncertainty that no owner wants to face. A better approach exists that reduces the emotional weight of not knowing when your RV will be ready again.
How Long Do RV Repairs Really Take in Southern California?
The most common question during RV service delays is straightforward: how long does RV repair take? Average repair event cycle time stretches far beyond what most owners expect, especially near major travel routes and population centers. Whether you drive a Class A motorhome, fifth wheel, Sprinter van, or commercial fleet vehicle, the wait feels endless when communication is limited and updates are rare.
Typical repair event cycle time across many shops ranges from several weeks to months depending on the scope of work and current bay availability. Dealer service often involves multiple steps and vendor handoffs that add extra time to the process. Independent shops may handle one task well but require coordination for everything else, which extends overall timelines. Mobile service offers convenience yet still faces RV parts delays that slow completion. RV repair at a full-service facility eliminates many of these extra steps.
Hidden steps such as warranty approval, parts ordering, and scheduling create additional delays that owners rarely see upfront. These factors turn what looks like a short job into a much longer ordeal that disrupts travel plans and daily routines. RV collision repair and RV body shop work often face the longest waits when shops lack in-house capabilities.
A clear picture of these timelines helps you make informed decisions and protect your schedule.
What Causes RV Service Delays and Waiting Weeks for RV Parts?
RV repair delays stem from several overlapping problems that quickly compound into longer waits. Supply chain issues - Rv Service And Repair Near Me Villa Park make it difficult to obtain the right parts exactly when needed for timely completion. Warranty processes require multiple approvals that stretch timelines and create uncertainty. Overloaded service bays during peak travel months leave less room for urgent or routine repairs. These bottlenecks create the extended waits that frustrate so many RV owners across the region
Supply chain problems continue to affect delivery of specialized RV components used in roof repair, slide-out repair, and electrical system upgrades. Warranty approval steps add paperwork and waiting periods that slow progress even when parts are available. Service bays fill quickly when travel season hits, leaving limited space for immediate work. RV roof repair and RV slide-out repair are two services frequently impacted by these delays.
Understanding these root causes empowers you to choose solutions that actually reduce downtime and restore your travel freedom sooner.
RV Technician Shortage Explained
Industry observations confirm a persistent RV technician shortage that directly fuels RV service delays across many areas. Fewer qualified technicians mean longer lines and slower completion times for every type of job. This shortage increases repair event cycle time and leaves many owners waiting longer than expected for their vehicles to return.
Current statistics highlight the gap between available technicians and growing demand for RV service. This shortage hits hardest on complex repairs that require specialized knowledge of modern systems. Class A motorhomes, Sprinter vans, and commercial fleet vehicles often need multiple skill sets that remain in short supply. Sprinter van repair is one area where the shortage creates especially long waits.
With extensive hands-on experience and industry certifications, the team helps reduce these delays through dedicated capacity and efficient processes.
Dealer vs Independent RV Repair
A direct comparison shows why certain paths create longer RV service delays for owners. Dealer service frequently involves multiple handoffs and limited bay availability that extend overall timelines. Independent shops may excel at one area but still require coordination for full repairs, which adds time and complexity. These differences create extra frustration when you simply want your RV back on the road quickly.
Typical dealer journeys include extra steps that extend the complete repair process. Independent options offer flexibility yet still face RV parts delays and scheduling challenges that slow results. One-stop facilities handle everything in one location and reduce the need for multiple vendors or transfers. RV remodel projects especially benefit from this streamlined approach.
Years of serving RV owners from Anaheim to San Diego have shown that a comprehensive approach closes many of these gaps.
How to Avoid RV Service Delays in Southern California
Practical steps help owners reduce future frustration with RV service delays near you. Choosing the right shop before problems start prevents many common headaches and extended waits. Good maintenance habits keep small issues from becoming major delays that disrupt plans. Understanding warranty rights during repairs protects your investment and gives you clear options when issues arise.
Key questions to ask upfront include expected turnaround times and parts availability policies. Regular maintenance catches problems early and keeps repair needs predictable rather than urgent. California consumer protections give owners important rights when delays occur beyond reasonable periods. RV maintenance is one of the best ways to prevent future RV repair delays.
Local RV service delays experts near the 5 and 91 freeways provide faster paths forward for owners throughout Southern California.
Real Impact of RV Service Delays on Your Lifestyle
RV repair delays affect far more than just the vehicle sitting in a shop. Full-time RVers and snowbirds lose precious travel time that cannot be recovered. Families miss planned vacations when repairs stretch on and disrupt carefully arranged schedules. Commercial operators face lost revenue when fleet vehicles sit idle instead of generating income.
One owner from Irvine shared that after waiting weeks for a slide-out repair they missed their entire summer trip and felt tremendous disappointment. Another from Huntington Beach noted the lack of regular updates made the wait even more stressful and eroded trust in the process. A third from Temecula said once they found a shop that could handle everything in one place the difference was night and day and their stress levels dropped immediately.
These real experiences highlight why faster solutions matter and how choosing the right facility changes the entire outcome. Read more customer stories.
RECT – Repair Event Cycle Time – The Metric That Defines Your Wait
Repair event cycle time has become the key metric that determines how long you actually lose when facing RV service delays. Most shops do not publish their RECT figures, making it hard for owners to compare options fairly. Strategies that focus on in-house parts inventory and coordinated scheduling measurably reduce this time and deliver better results.
Understanding how RECT is calculated helps owners evaluate shops more effectively before committing. Focused processes deliver consistent efficiency so you spend less time waiting and more time enjoying the road with confidence. Explore our RV service approach that targets reduced RECT.
Ready to End the Cycle of RV Service Delays?
You no longer need to accept long RV service delays as normal. Same-week or faster service becomes possible when a shop maintains the right resources and streamlined processes. One-stop solutions handle every system from roof repair and slide-out repair to generator service, solar panel installation, and custom upgrades without sending you elsewhere. Transparent pricing removes surprise costs and builds trust from the first conversation. RV paint shop and RV body shop services benefit greatly from this model.
Common Concerns About RV Service Delays and How They Are Solved
Many owners worry about hidden costs and unclear timelines when dealing with RV service delays. Pricing transparency and clear communication address these concerns directly and reduce anxiety. Managing expectations during peak seasons keeps stress levels lower and creates more realistic planning. Protecting warranty rights while speeding up repairs gives owners confidence that their investment remains secure. RV collision repair is one area where clear expectations make a big difference.
Areas We Serve Throughout Southern California
RV service delays near you affect owners across a wide region. Service reaches Southern California and all surrounding communities. Convenient access near the 5 and 91 freeways makes drop-off simple for travelers from many directions. RV repair near me searches often lead owners to our location.
We Can Help! Contact Us Today
If you are tired of RV service delays and waiting weeks for RV parts, a reliable full-service solution makes all the difference. The team helps RV owners, commercial operators, and fleet managers across Southern California regain their time and peace of mind. Whether you need roof repair, slide-out repair, generator service, solar panel installation, or full custom upgrades, everything is handled in one convenient location.
23281 La Palma Ave. Yorba Linda CA 92887, (714) 909-1444.
You deserve the emotional relief that comes from ending prolonged frustration and the logical benefit of protected travel plans and preserved vehicle value. Faster repairs, transparent communication, and expert handling restore confidence and deliver measurable return on every repair investment. Schedule your service today and stop waiting.

OCRV Center
Address: 23281 La Palma Ave Yorba Linda, CA 92887Phone: (714) 909-1444
Email: [email protected]
OCRV Center
Motorhome Repair Service Villa Park, CA
Full Service Rv Repair Near Me Villa Park, CA
Rv Service And Repair Near Me Villa Park, CA
Rv Refrigerator Repair Near Me Villa Park, CA
Rv Refrigerator Repair Near Me Villa Park, CA
Rv Repair Centers Near Me Villa Park, CA
Rv Repair Shops Near My Location Villa Park, CA
Rv Refrigerator Repair Near Me Villa Park, CA
Best Rv Repair Near Me Villa Park, CA
Rv Service And Repair Near Me Villa Park, CA
Rv Repair Shops Near My Location Villa Park, CA
Rv Solar Installation Villa Park, CA
Rv Mechanics Near Me Villa Park, CA
Best Rv Repair Near Me Villa Park, CA
Rv Ceiling Repair Villa Park, CA
Motorhome Service And Repair Near Me Villa Park, CA
Rv Plumbing Repair Near Me Villa Park, CA
Motorhome Repair Shop Villa Park, CA
Motorhome Generator Repair Near Me Villa Park, CA
Rv Repair Centers Near Me Villa Park, CA
Motorhome Repair Shop Villa Park, CA
Motorhome Refrigerator Repair Villa Park, CA
Rv Service And Repair Near Me Villa Park, CA
Best Rv Repair Near Me Villa Park, CA
Rv Mechanics Near Me Villa Park, CA
Rv Plumbing Repair Near Me Villa Park, CA
Rv Service And Repair Near Me Villa Park, CA
Full Service Rv Repair Near Me Villa Park, CA
Rv Repair Centers Near Me Villa Park, CA
Best Rv Repair Near Me Villa Park, CA
Rv Generator Repair Villa Park, CA
Rv Refrigerator Repair Near Me Villa Park, CA
Rv Mechanics Near Me Villa Park, CA
Rv Refrigerator Repair Near Me Villa Park, CA
Rv Repair Service Near Me Villa Park, CA
Rv Mechanics Near Me Villa Park, CA
Motorhome Repair Shop Villa Park, CA
Rv Repairs Near Me Villa Park, CA
Motorhome Awning Repair Villa Park, CA
Motorhome Repair Shop Villa Park, CA
Motorhome Refrigerator Repair Villa Park, CA
Rv Ceiling Repair Villa Park, CA
Motorhome Awning Repair Villa Park, CA
Rv Repairs Near Me Villa Park, CA
Rv Refrigerator Repair Near Me Villa Park, CA
Rv Repair Places Near Me Villa Park, CA
Rv Solar Installation Villa Park, CA
Rv Repair In My Area Villa Park, CA
Rv Repair Centers Near Me Villa Park, CA
Rv Service Repair Near Me Villa Park, CA
Rv Service And Repair Near Me Villa Park, CA
Rv Solar Panel Installation Villa Park, CA
Rv Generator Repair Villa Park, CA
Full Service Rv Repair Near Me Villa Park, CA
Motorhome Repair Near Me Villa Park, CA
Rv Repair Centers Near Me Villa Park, CA
Rv Service And Repair Near Me Villa Park, CA
Motorhome Generator Repair Near Me Villa Park, CA
Rv Mechanics Near Me Villa Park, CA
Rv Repair Centers Near Me Villa Park, CA
Rv Solar Installation Villa Park, CA
Rv Generator Repair Villa Park, CA
Rv Floor Repair Near Me Villa Park, CA
Rv Solar Panel Installation Villa Park, CA
Camper Ac Repair Near Me Villa Park, CA
Rv Repair Centers Near Me Villa Park, CA
Rv Delamination Repair Near Me Villa Park, CA
Full Service Rv Repair Near Me Villa Park, CA
Rv Refrigerator Repair Near Me Villa Park, CA
Motorhome Service And Repair Near Me Villa Park, CA
Rv Ceiling Repair Villa Park, CA
Rv Plumbing Repair Near Me Villa Park, CA
Rv Delamination Repair Near Me Villa Park, CA
Rv Repair Services Near Me Villa Park, CA
Full Service Rv Repair Near Me Villa Park, CA
Rv Solar Panel Installation Villa Park, CA
Motorhome Repair Shops Villa Park, CA
Rv Floor Repair Near Me Villa Park, CA
Finding A Local Seo Packages Villa Park, CA
Near Me Seo Marketing Company Villa Park, CA
OCRV Center
Camper Ac Repair Near Me Villa Park, CA
Motorhome Refrigerator Repair Villa Park, CA
Table of Contents
- – OCRV Center
- – Why Are RV Service Delays Getting Worse?
- – How Long Do RV Repairs Really Take in Southern...
- – What Causes RV Service Delays and Waiting Week...
- – RV Technician Shortage Explained
- – Dealer vs Independent RV Repair
- – How to Avoid RV Service Delays in Southern Cal...
- – Real Impact of RV Service Delays on Your Lifes...
- – RECT – Repair Event Cycle Time – The Metric Th...
- – Ready to End the Cycle of RV Service Delays?
- – Common Concerns About RV Service Delays and Ho...
- – Areas We Serve Throughout Southern California
- – We Can Help! Contact Us Today
- – OCRV Center
Latest Posts
Irvine Medicare Supplement Insurance Near Me
Affordable Home Insurance For Seniors Seal Beach
Employee Benefits Outsourcing Companies Fullerton
More
Latest Posts
Irvine Medicare Supplement Insurance Near Me
Affordable Home Insurance For Seniors Seal Beach
Employee Benefits Outsourcing Companies Fullerton